Unit 3
Assignment:
The text in bold is what I chose to be my assignment:
Unit 3.1
Choose one of these:
Screenprint your own 'Foundations of Fabrication' T-shirt
Sew another Face Mask for COVID-19
T-Shirt turned into a simple bag
Unit 3.2
Make a simple wearable electronics project with one of these starter options:
an Adafruit Gemma M0
a Sparkfun LilyPad LilyMini
A Sparkfun LilyPad Protosnap
a CR2032 battery pack and led 'sequins'
Starting Off - Unit 3.1
First of all, I’m coming into this with a tiny bit of experience with a sewing machine (basically just knowing how to set up a machine), but no where near enough to actually sew something. This was all pretty much totally new to me! But I love what you can accomplish with sewing, and this assignment made me excited to get more comfortable
As I started getting my fabric and putting everything together, I realized a lot of what I needed to do is just common sense (Note: I do not have a lot of this) and after my first time doing this I don’t think I’ll need to follow any sort of instructional video or will need to rely on someone to guide my hand.
Nitty Gritty - How I actually managed to make a mask:
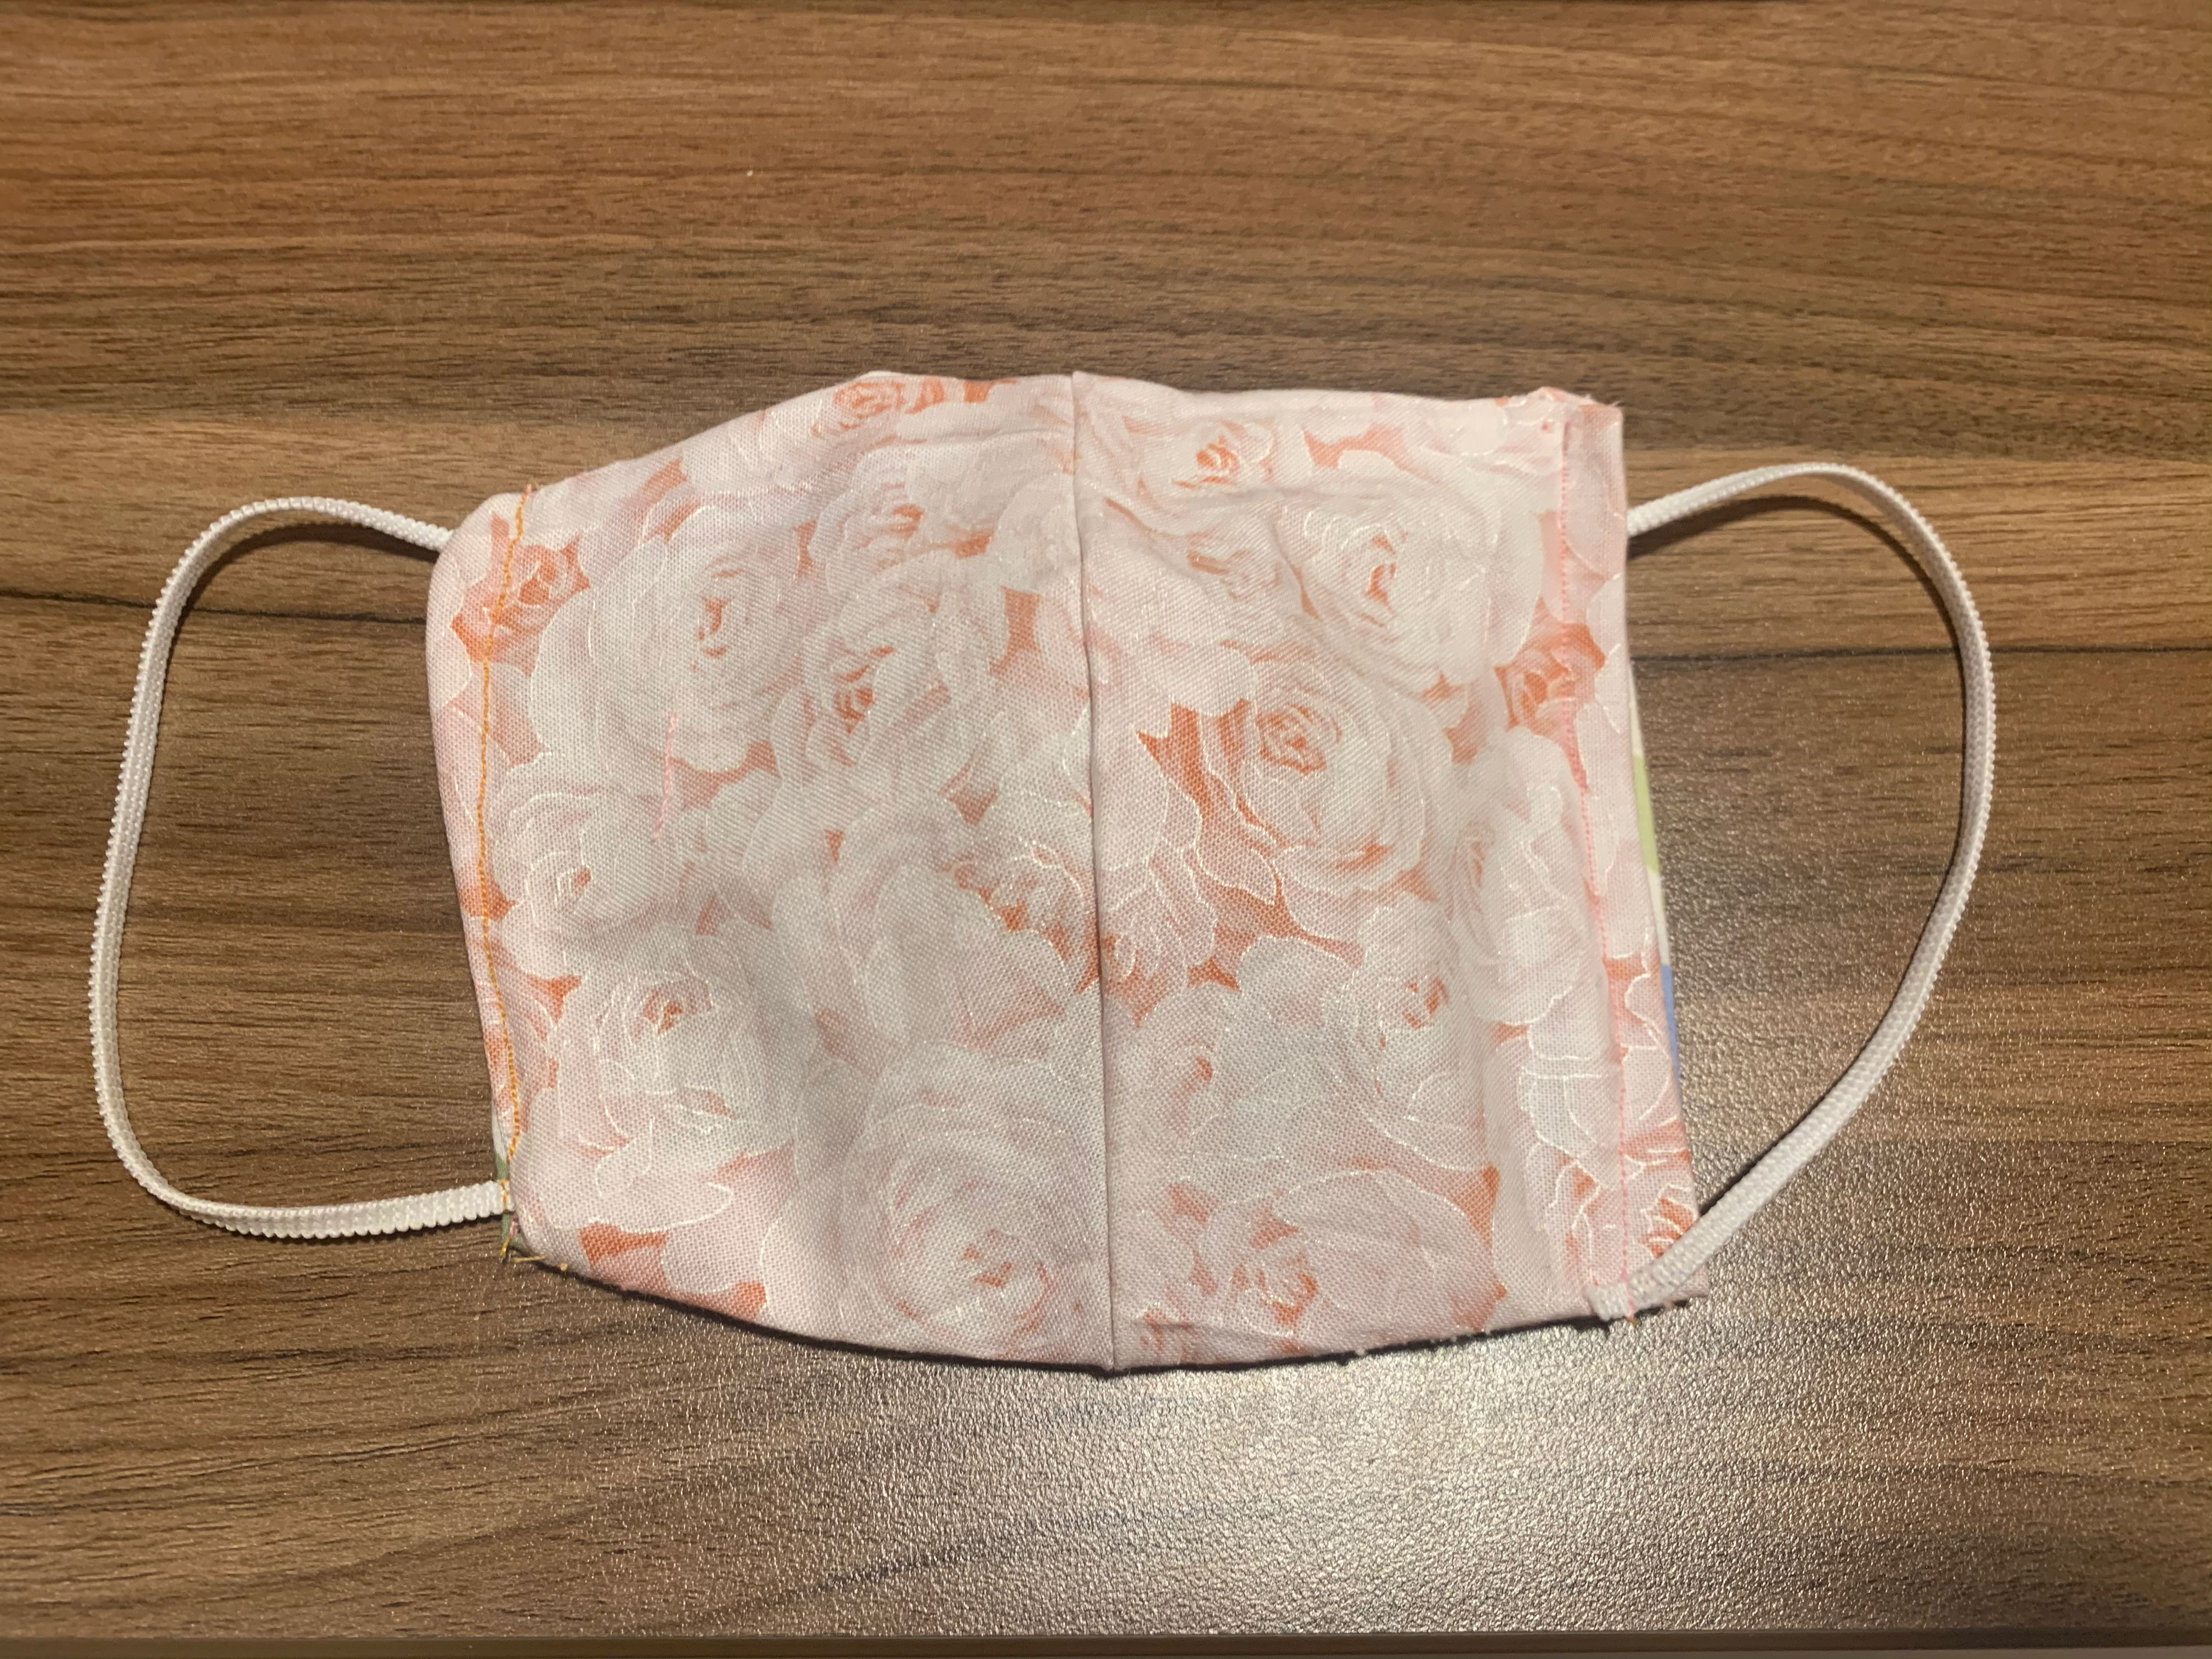
It’s reversible!!!!
![]()
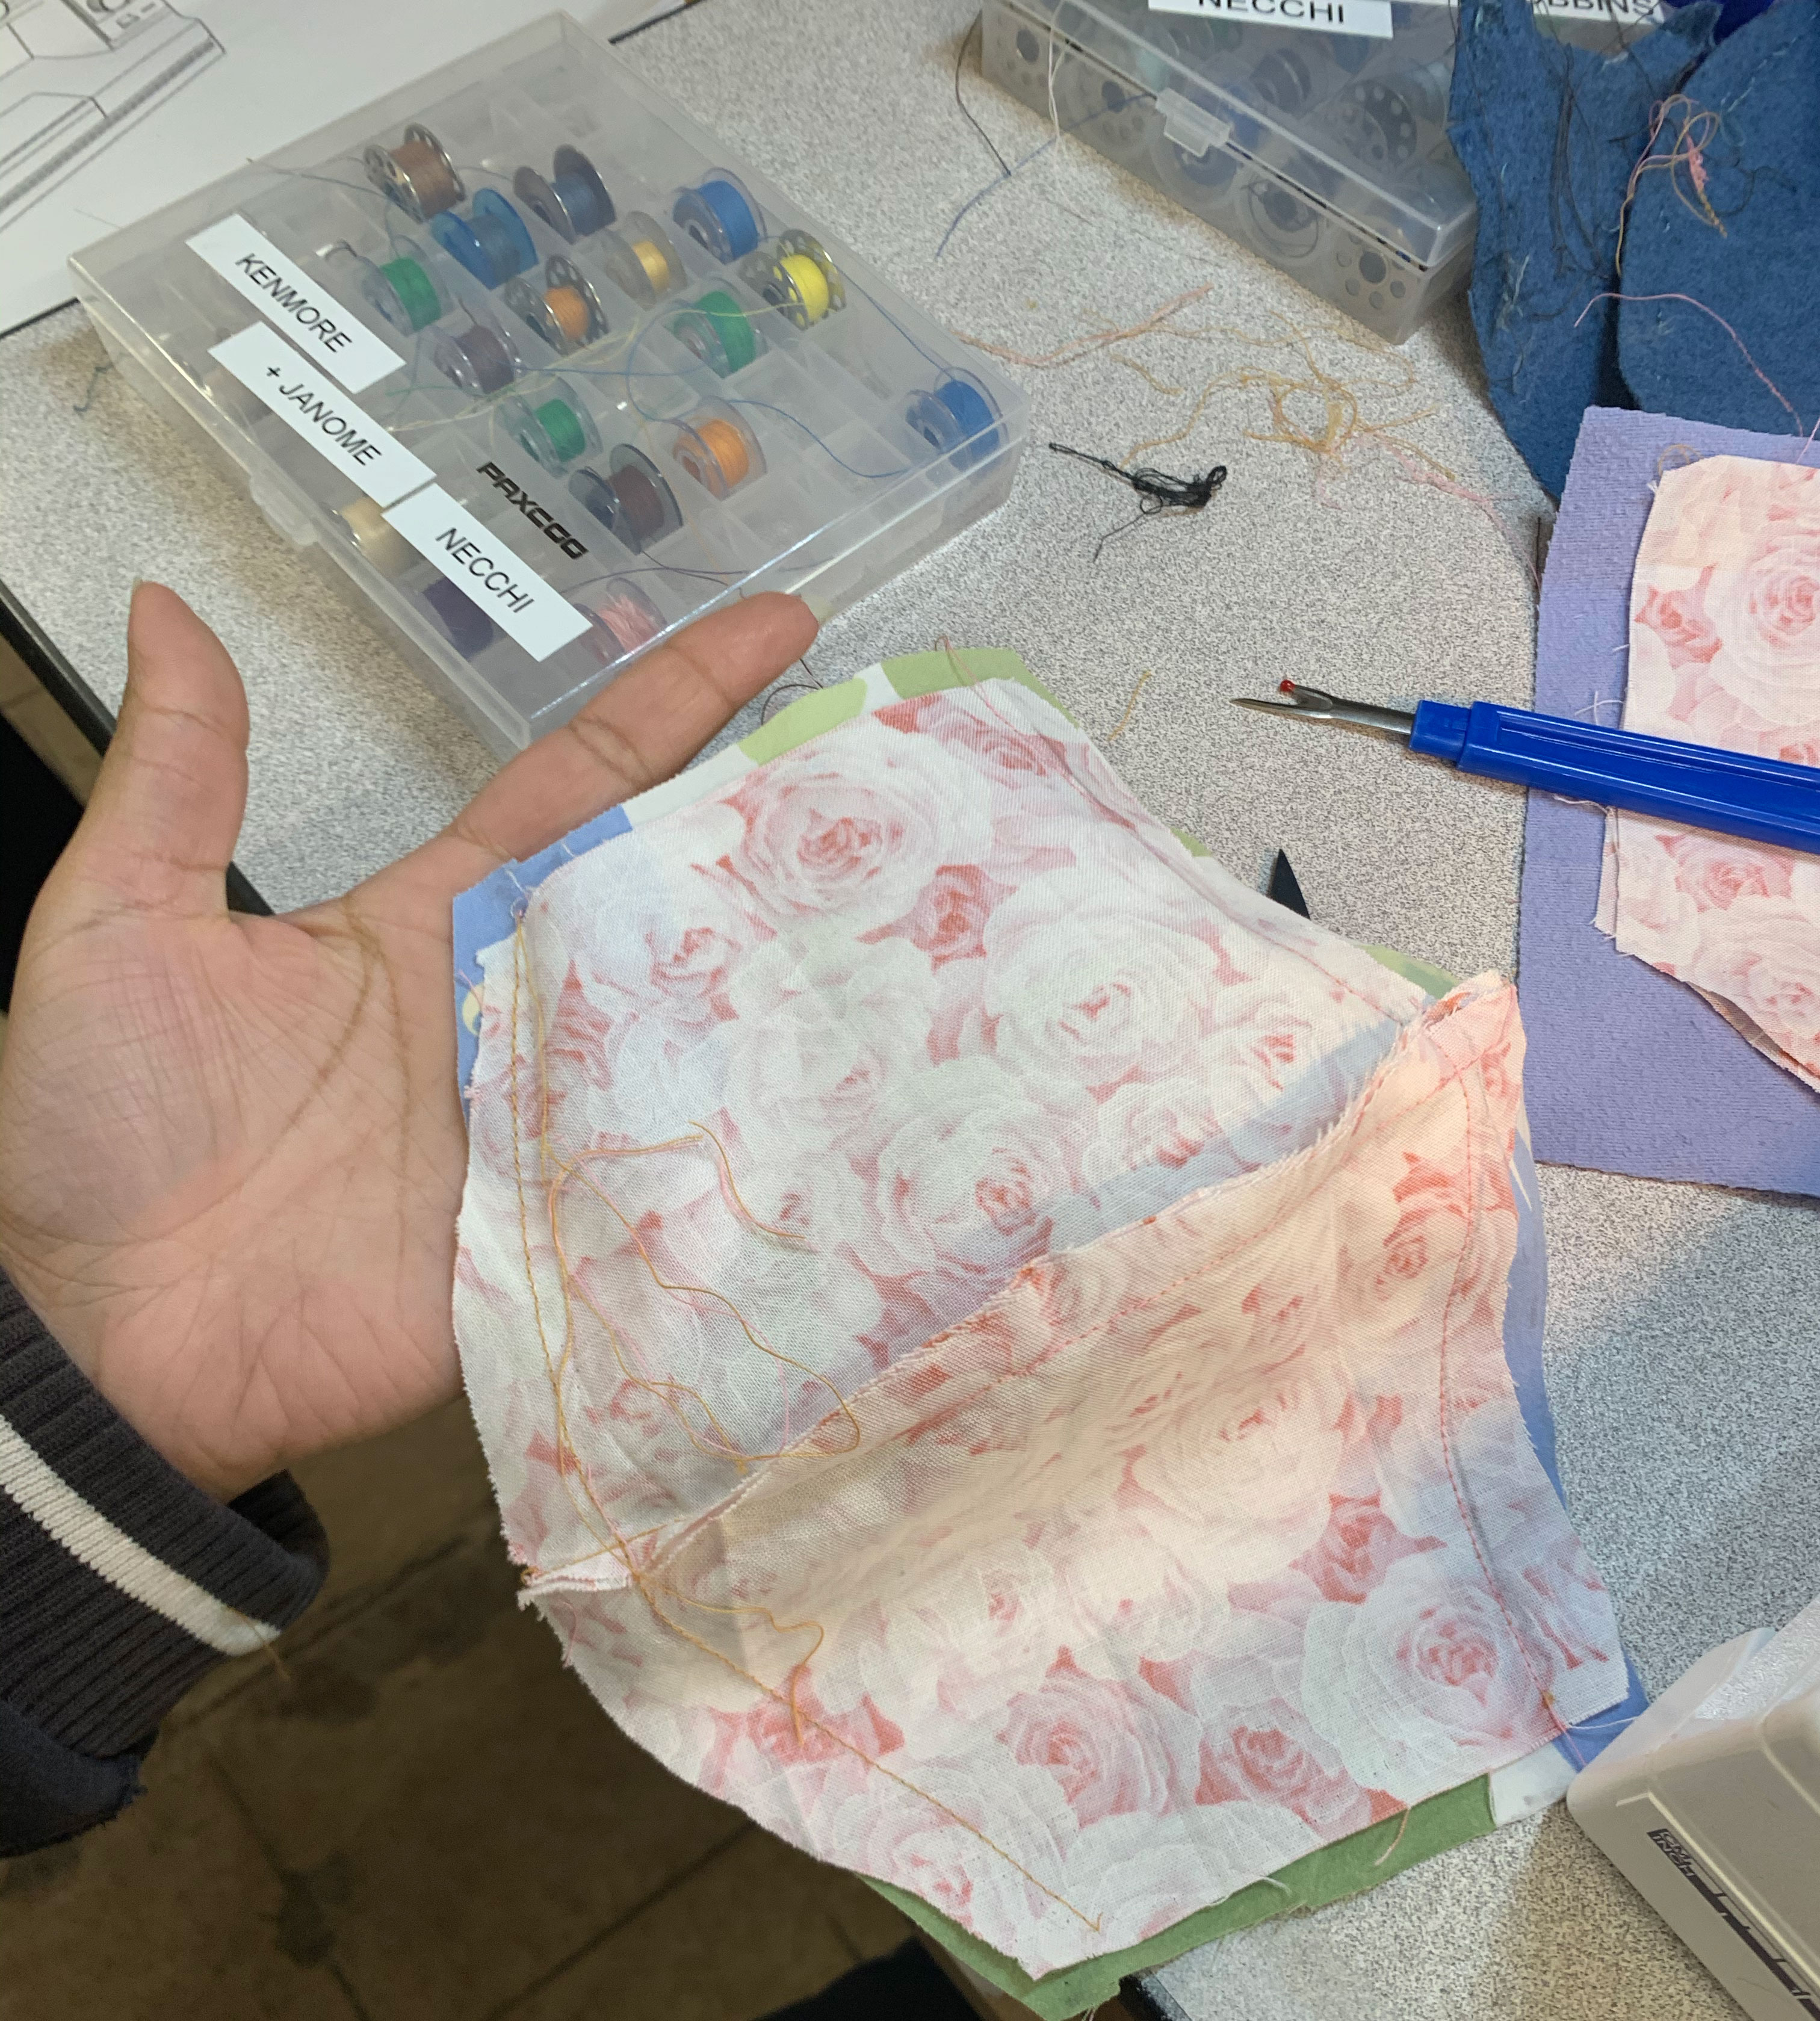
1. First I started off by buying 100% cotton fabric. I got mines from Joanne’s fabric but next time I’m going to go out of my way to find something local.
I traced the outline of another mask (common sense I didn’t know I had kicking in here) and added about 1/2 inch all around so that I would have room for error. I did this twice (one is the rose fabric, the other is the fish fabric)
2. I forgot to take a picture of this but next I sewed the left and right pieces (think left and right cheek) together. And aagin I did this for both fabrics, so in the end, it has that basic single facemask shape
![]()
3. After that, I took both fabrics and sewed the top and bottom of them, making sure that the center of each of the fabrics matched up aka, from the top of the nose bridge to the mouth (see image below)
Sewing tops and bottoms together:
![]()
Finally, to be completely transparent here there was a lot of trial and error (and a lot of needing to start over and rip some stitches out!) and that is normal and frustrating and totally ok!
First of all, I’m coming into this with a tiny bit of experience with a sewing machine (basically just knowing how to set up a machine), but no where near enough to actually sew something. This was all pretty much totally new to me! But I love what you can accomplish with sewing, and this assignment made me excited to get more comfortable
As I started getting my fabric and putting everything together, I realized a lot of what I needed to do is just common sense (Note: I do not have a lot of this) and after my first time doing this I don’t think I’ll need to follow any sort of instructional video or will need to rely on someone to guide my hand.
Nitty Gritty - How I actually managed to make a mask:
It’s reversible!!!!

1. First I started off by buying 100% cotton fabric. I got mines from Joanne’s fabric but next time I’m going to go out of my way to find something local.
I traced the outline of another mask (common sense I didn’t know I had kicking in here) and added about 1/2 inch all around so that I would have room for error. I did this twice (one is the rose fabric, the other is the fish fabric)
2. I forgot to take a picture of this but next I sewed the left and right pieces (think left and right cheek) together. And aagin I did this for both fabrics, so in the end, it has that basic single facemask shape

3. After that, I took both fabrics and sewed the top and bottom of them, making sure that the center of each of the fabrics matched up aka, from the top of the nose bridge to the mouth (see image below)
Sewing tops and bottoms together:
Finally, to be completely transparent here there was a lot of trial and error (and a lot of needing to start over and rip some stitches out!) and that is normal and frustrating and totally ok!
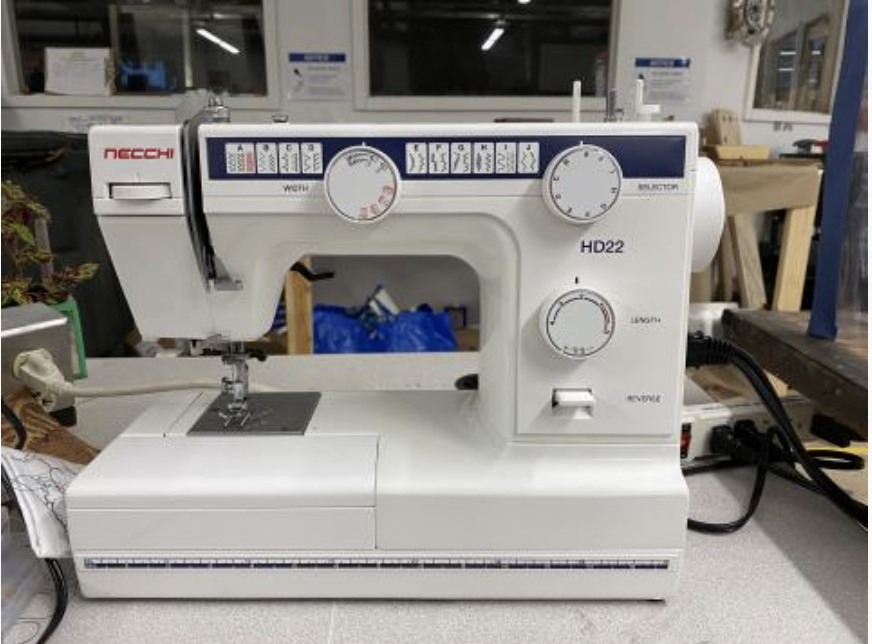
This is the sewing machine I used at Makehaven to make my mask:
Necchi HD22 Portable Sewing Machine
![]()
I watched this video here to re-learn + understand the basics of how to set up a sewing machine.
![]()
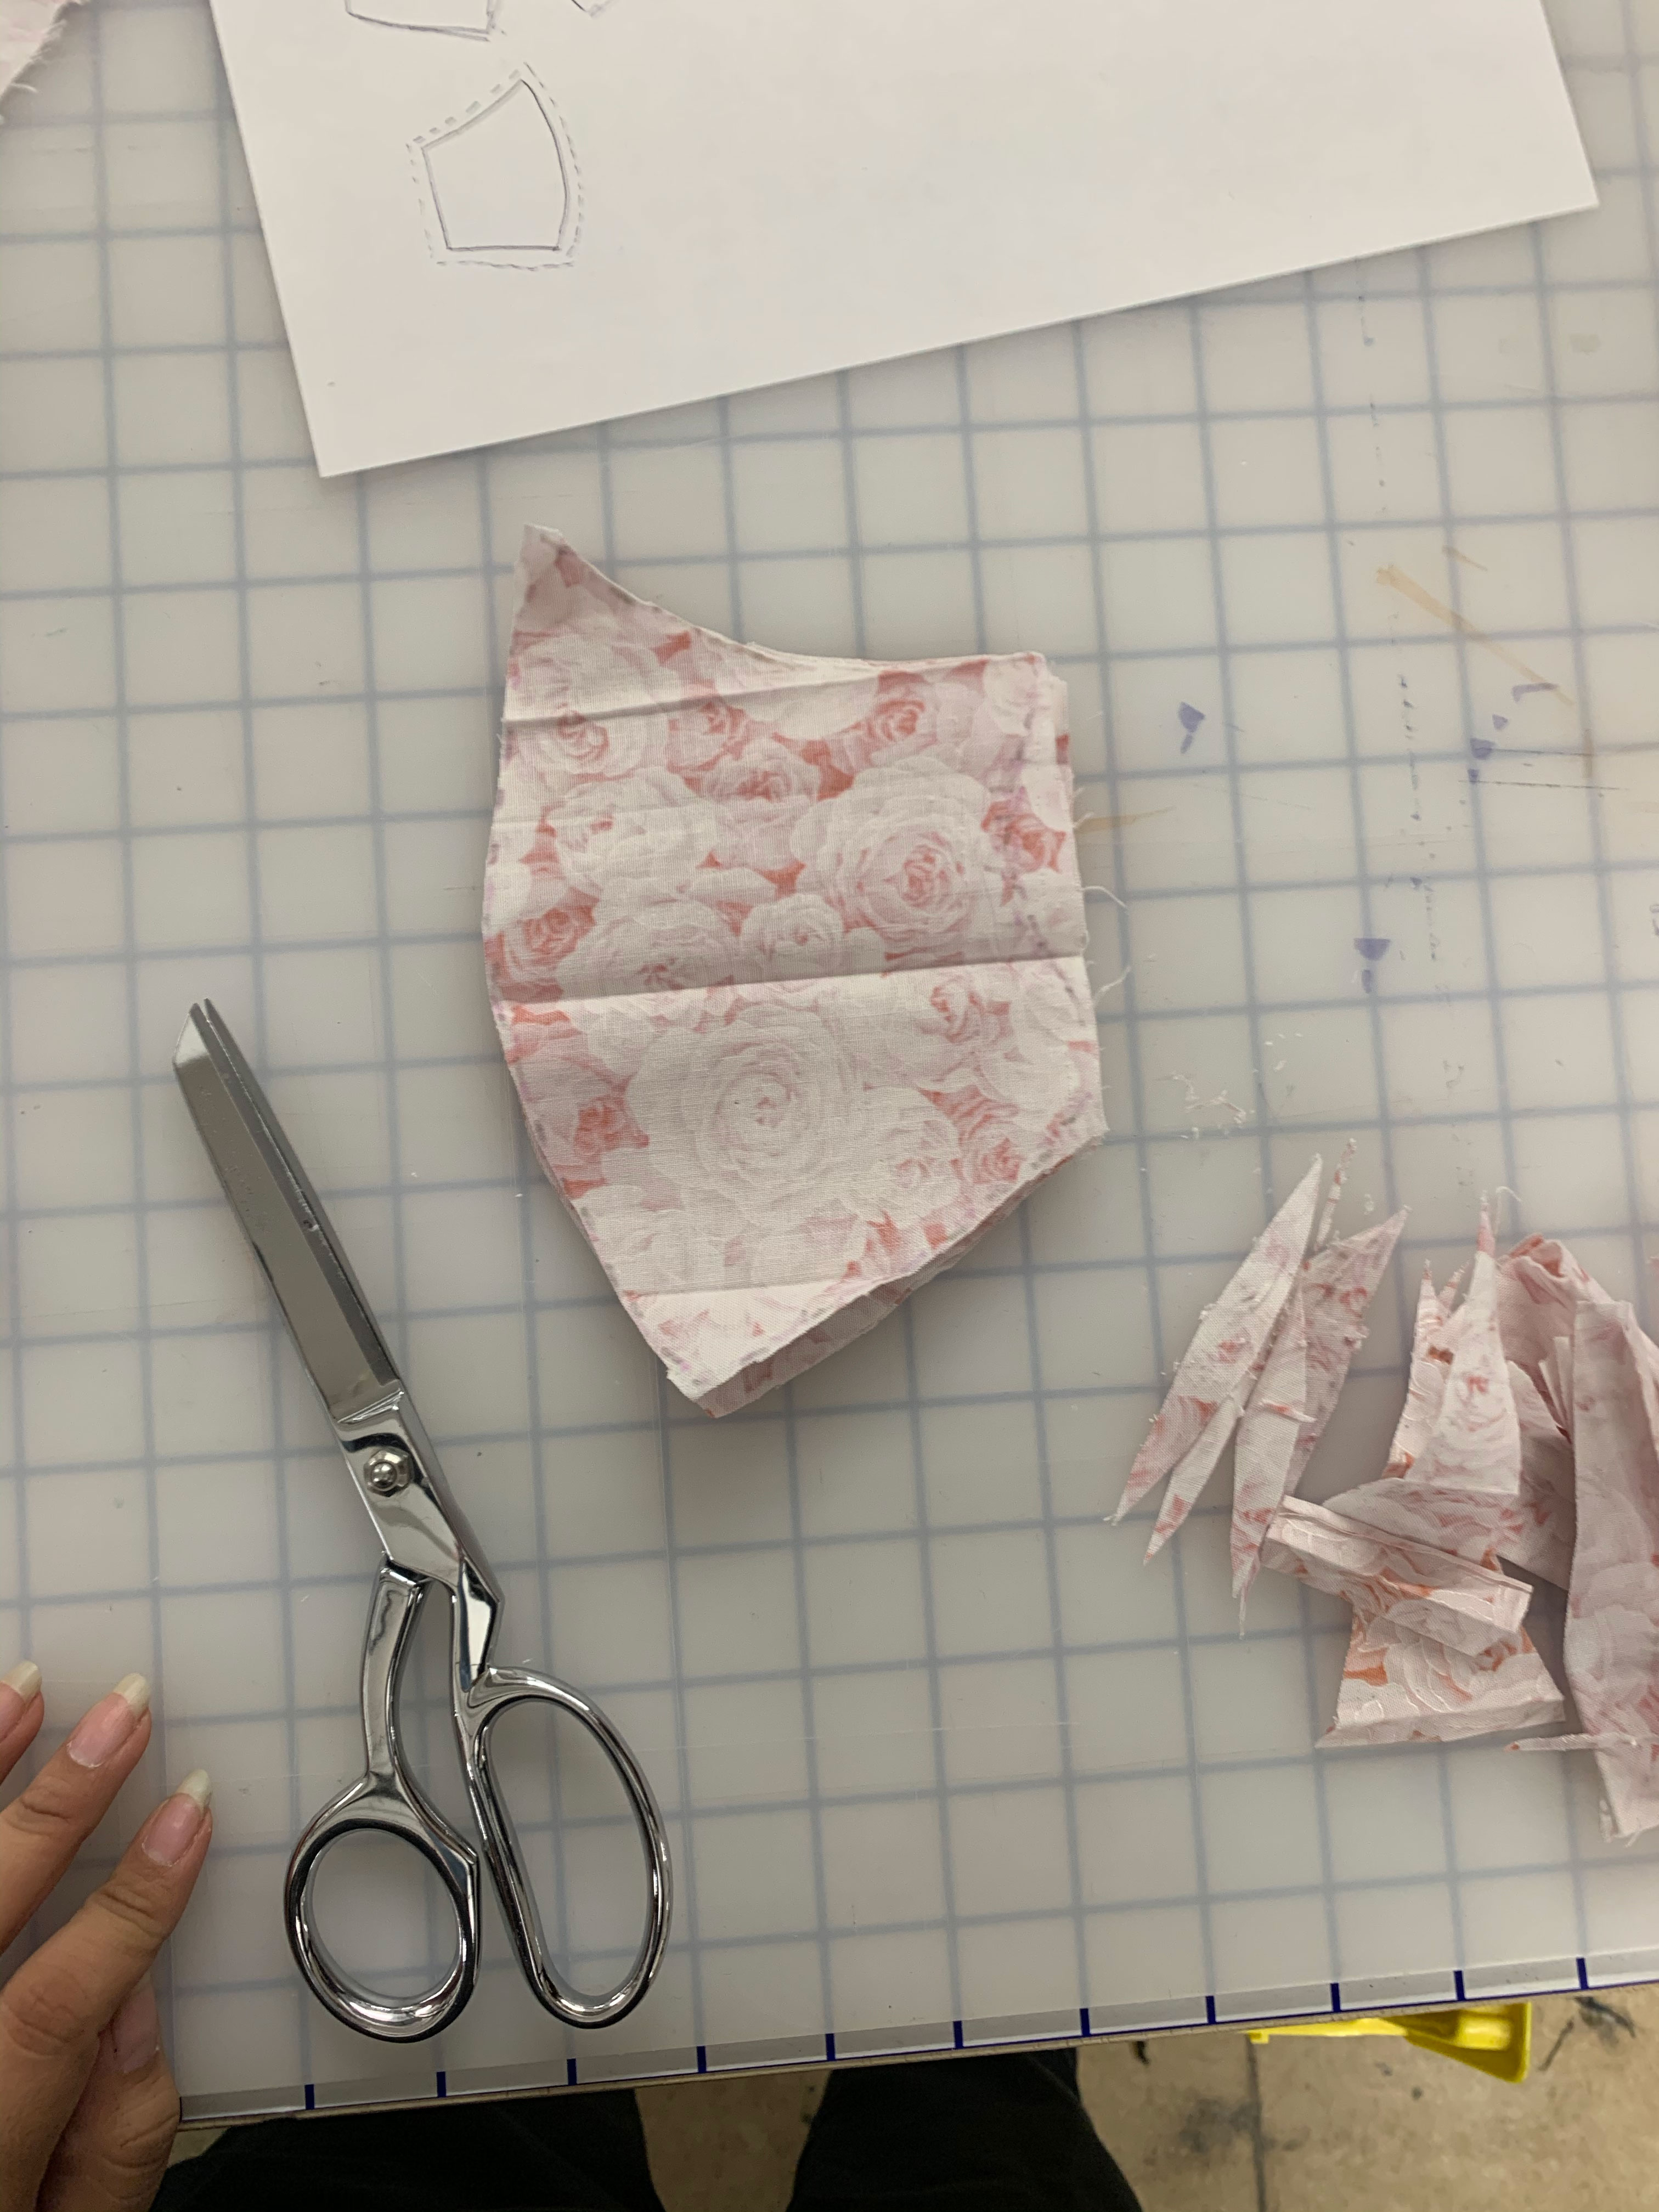
(Image below: first cut of fabric after tracing the outline of another mask)
![]()
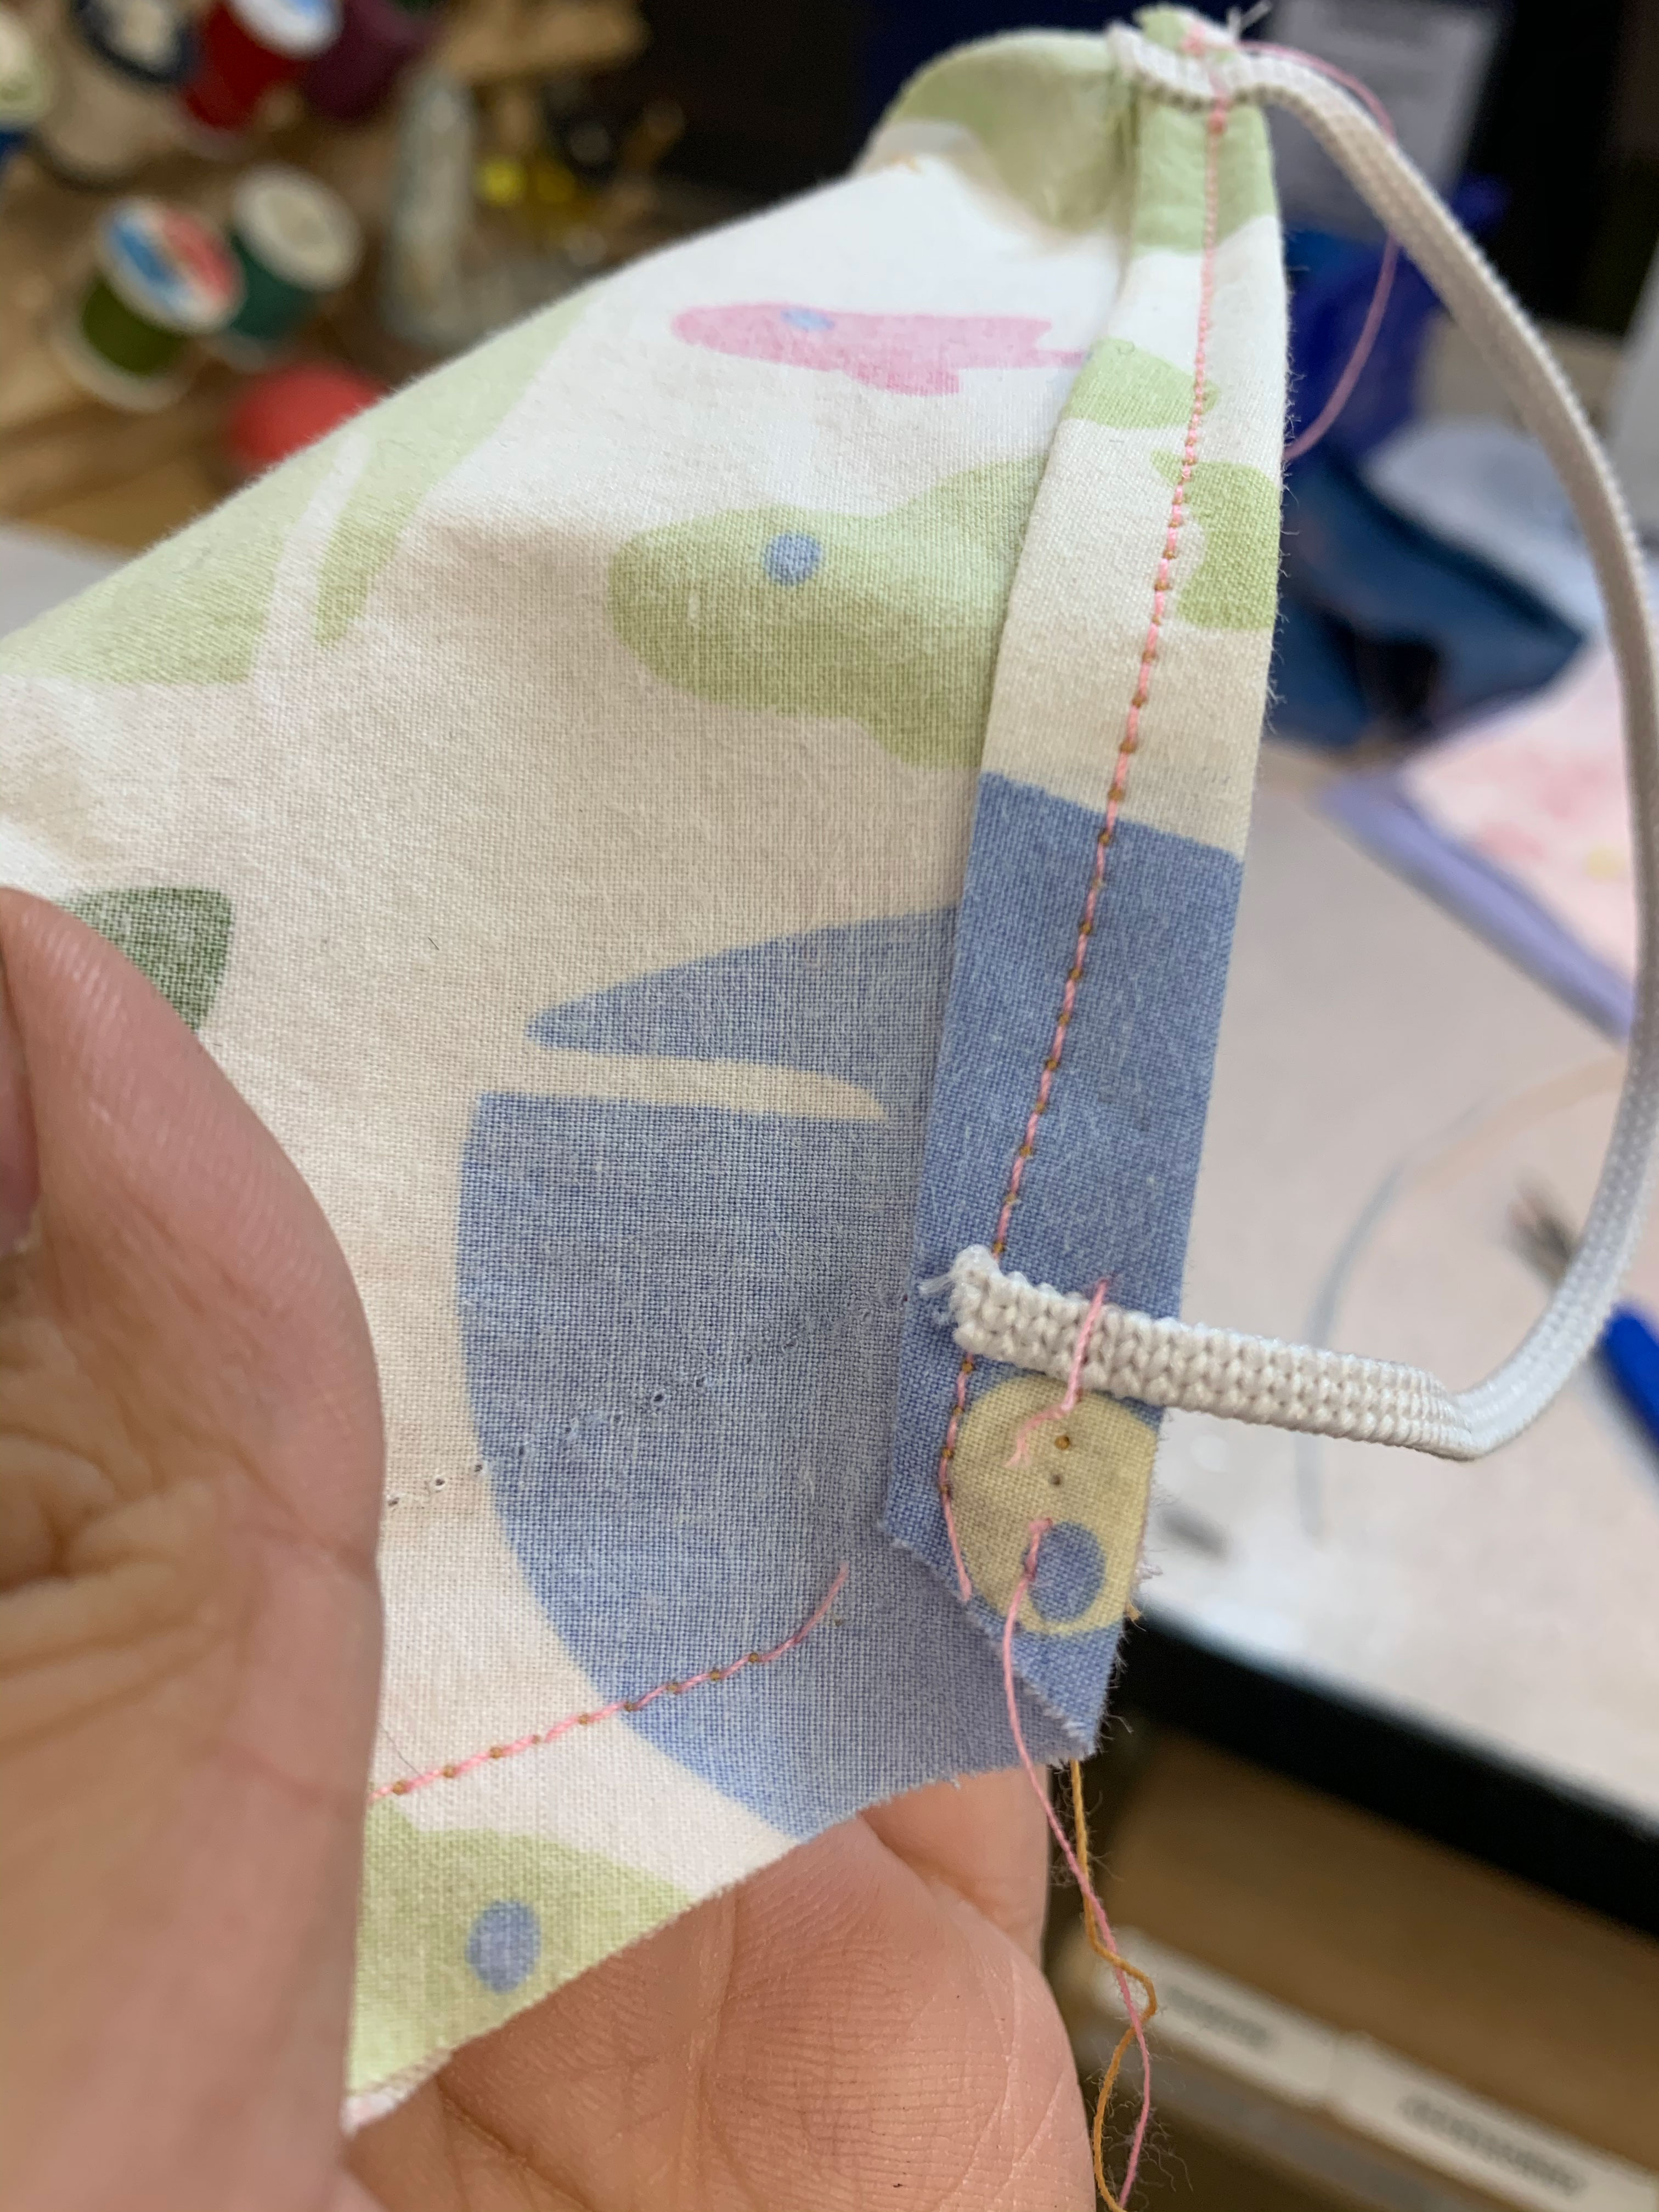
Then, I rolled of the left and right ends and sewed those too! One at a time, and included the elastics![]()
Necchi HD22 Portable Sewing Machine
I watched this video here to re-learn + understand the basics of how to set up a sewing machine.
(Image below: first cut of fabric after tracing the outline of another mask)
Then, I rolled of the left and right ends and sewed those too! One at a time, and included the elastics
TEXT
Image:
Conclusion
Image:
Unit 2
October 19th, 2020
Assignment:
Complete a wine bottle holder, cutting board, or other small woodworking project of your choosing.
Starting Off
I have most of the badges in the woodshop and often use these tools for work (table saw, band saw, chop saw, jointer, etc), so I knew I wanted to try something new! I ended up deciding on the Lathe, which is a tool that is used to make wooden cups, bowls and even table legs all starting from a block of wood! Basically the Lathe holds your block of wood and spins at a really fast speed while you chip away at it using a sharp pointy tool.
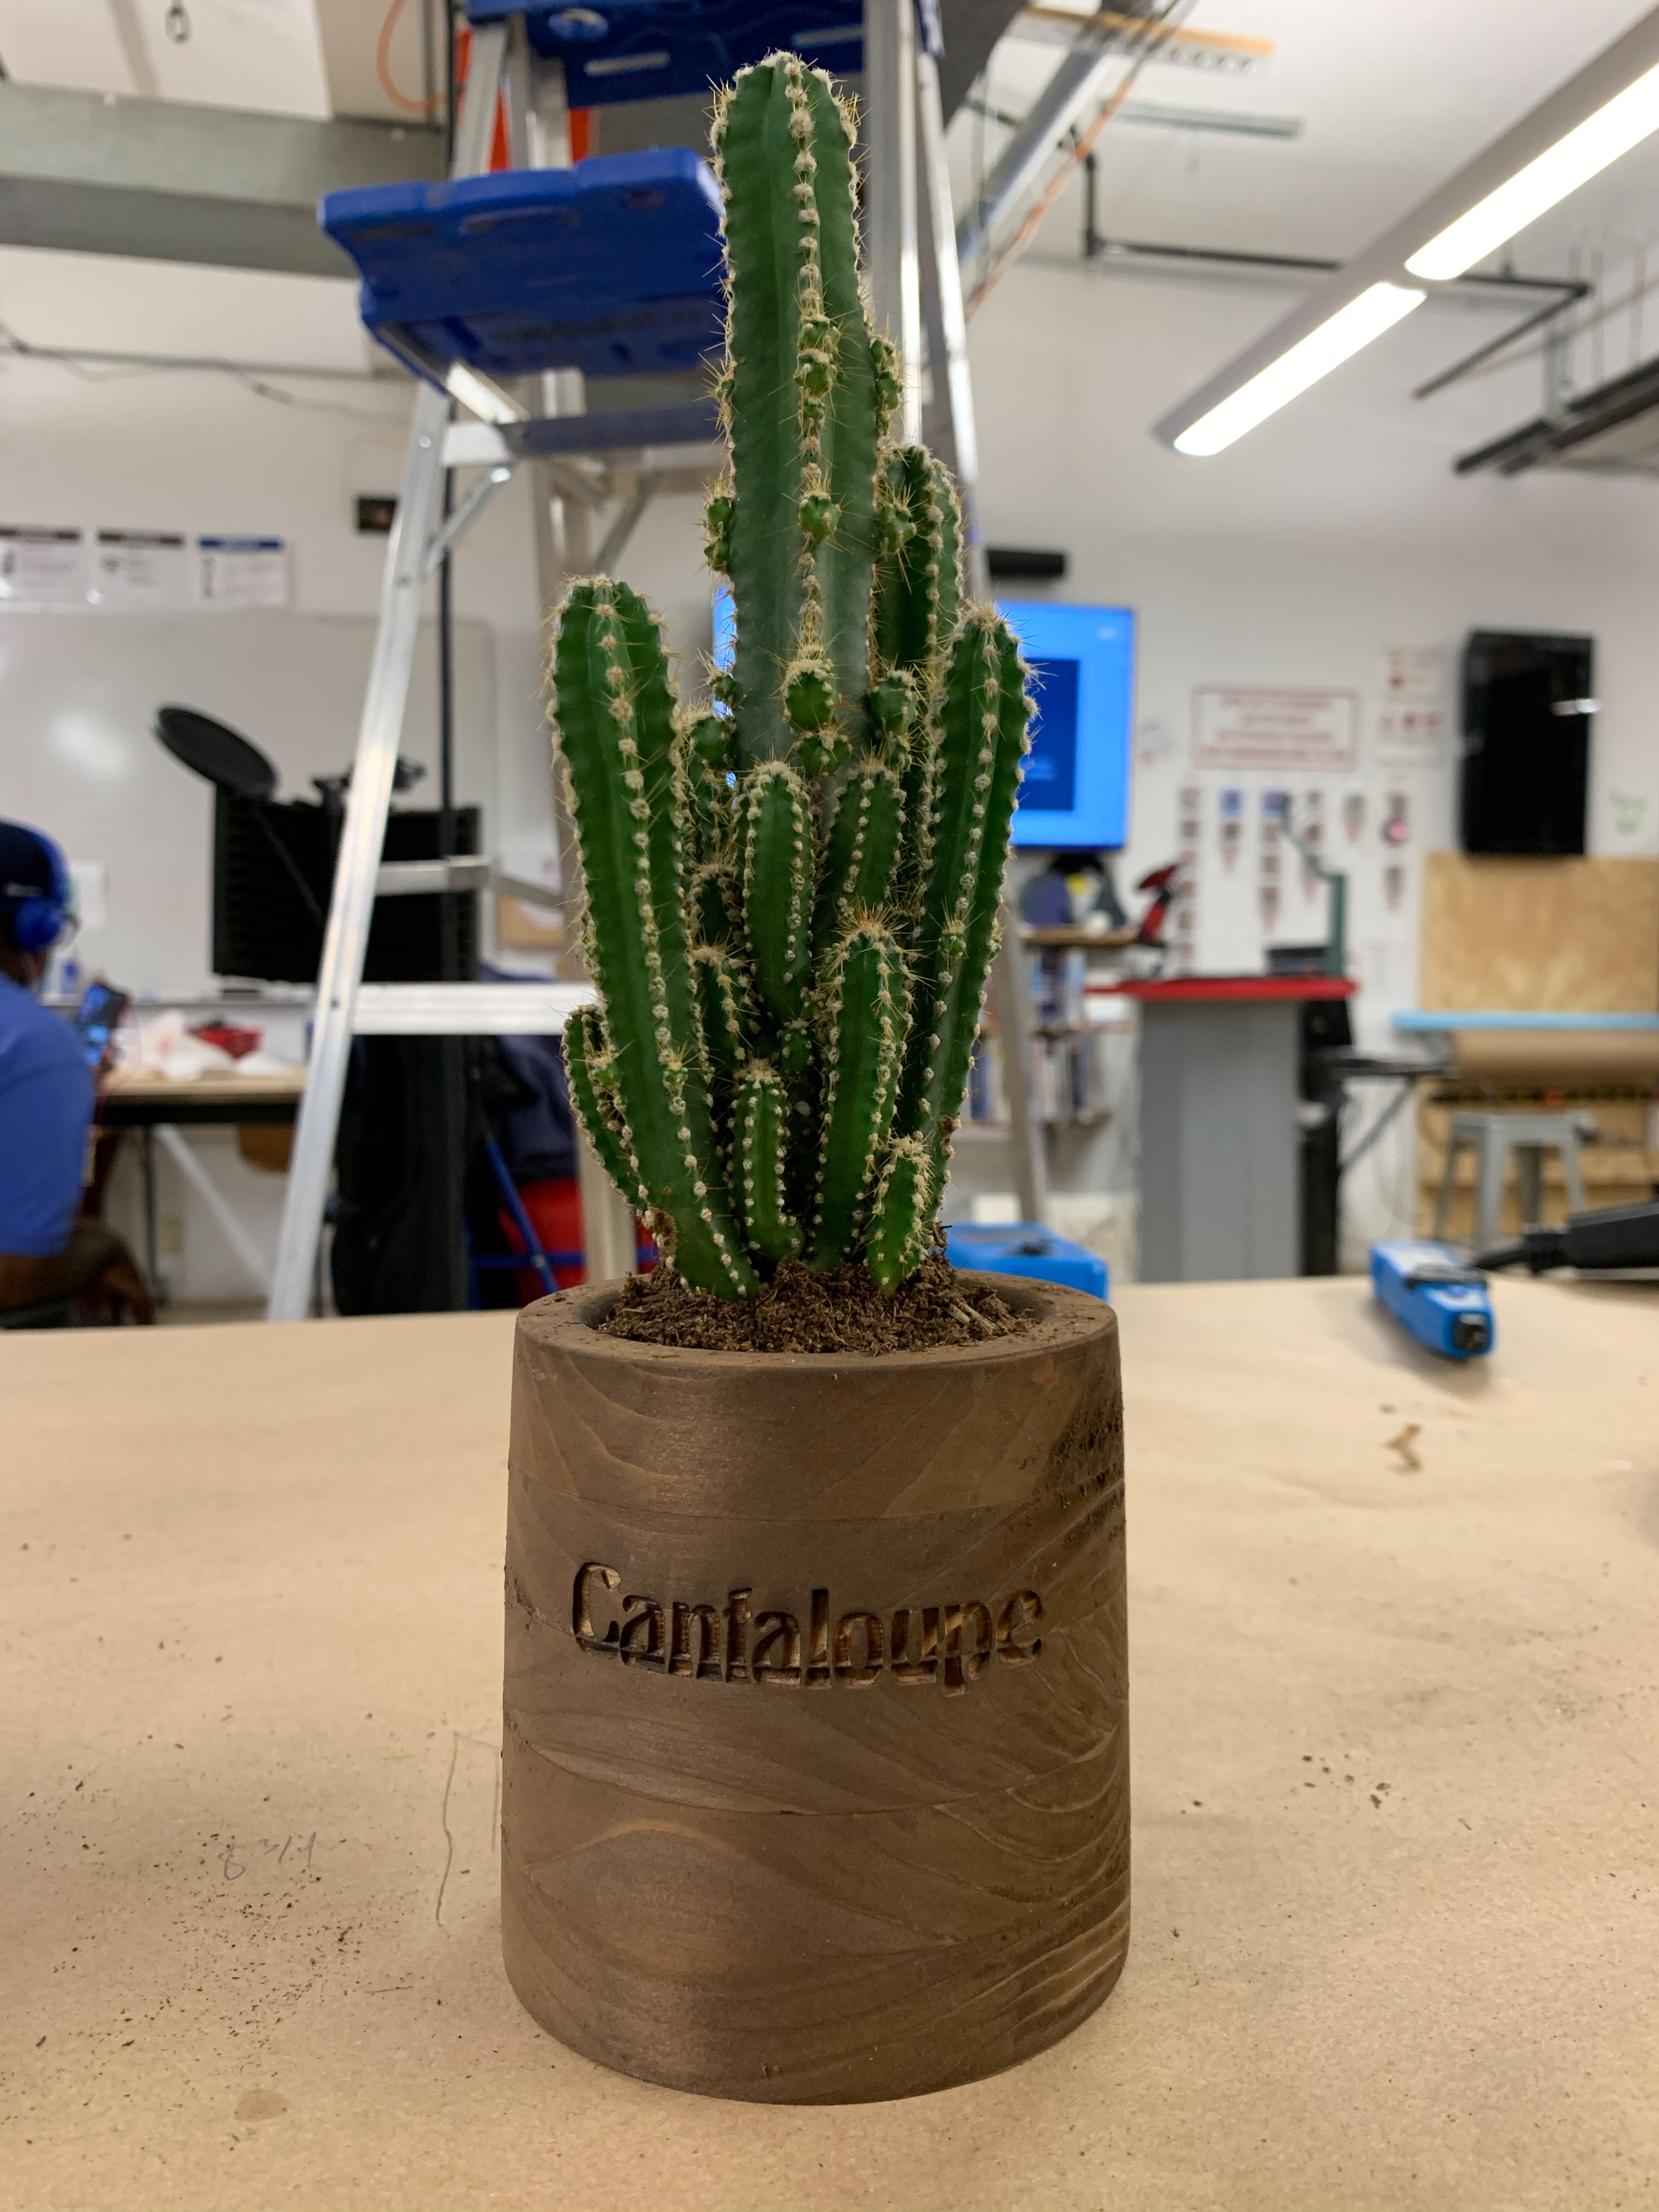
Using the Lathe I made a 4” tall pot for my cactus, Cantaloupe. Here’s how I did it:
I have most of the badges in the woodshop and often use these tools for work (table saw, band saw, chop saw, jointer, etc), so I knew I wanted to try something new! I ended up deciding on the Lathe, which is a tool that is used to make wooden cups, bowls and even table legs all starting from a block of wood! Basically the Lathe holds your block of wood and spins at a really fast speed while you chip away at it using a sharp pointy tool.
Using the Lathe I made a 4” tall pot for my cactus, Cantaloupe. Here’s how I did it:
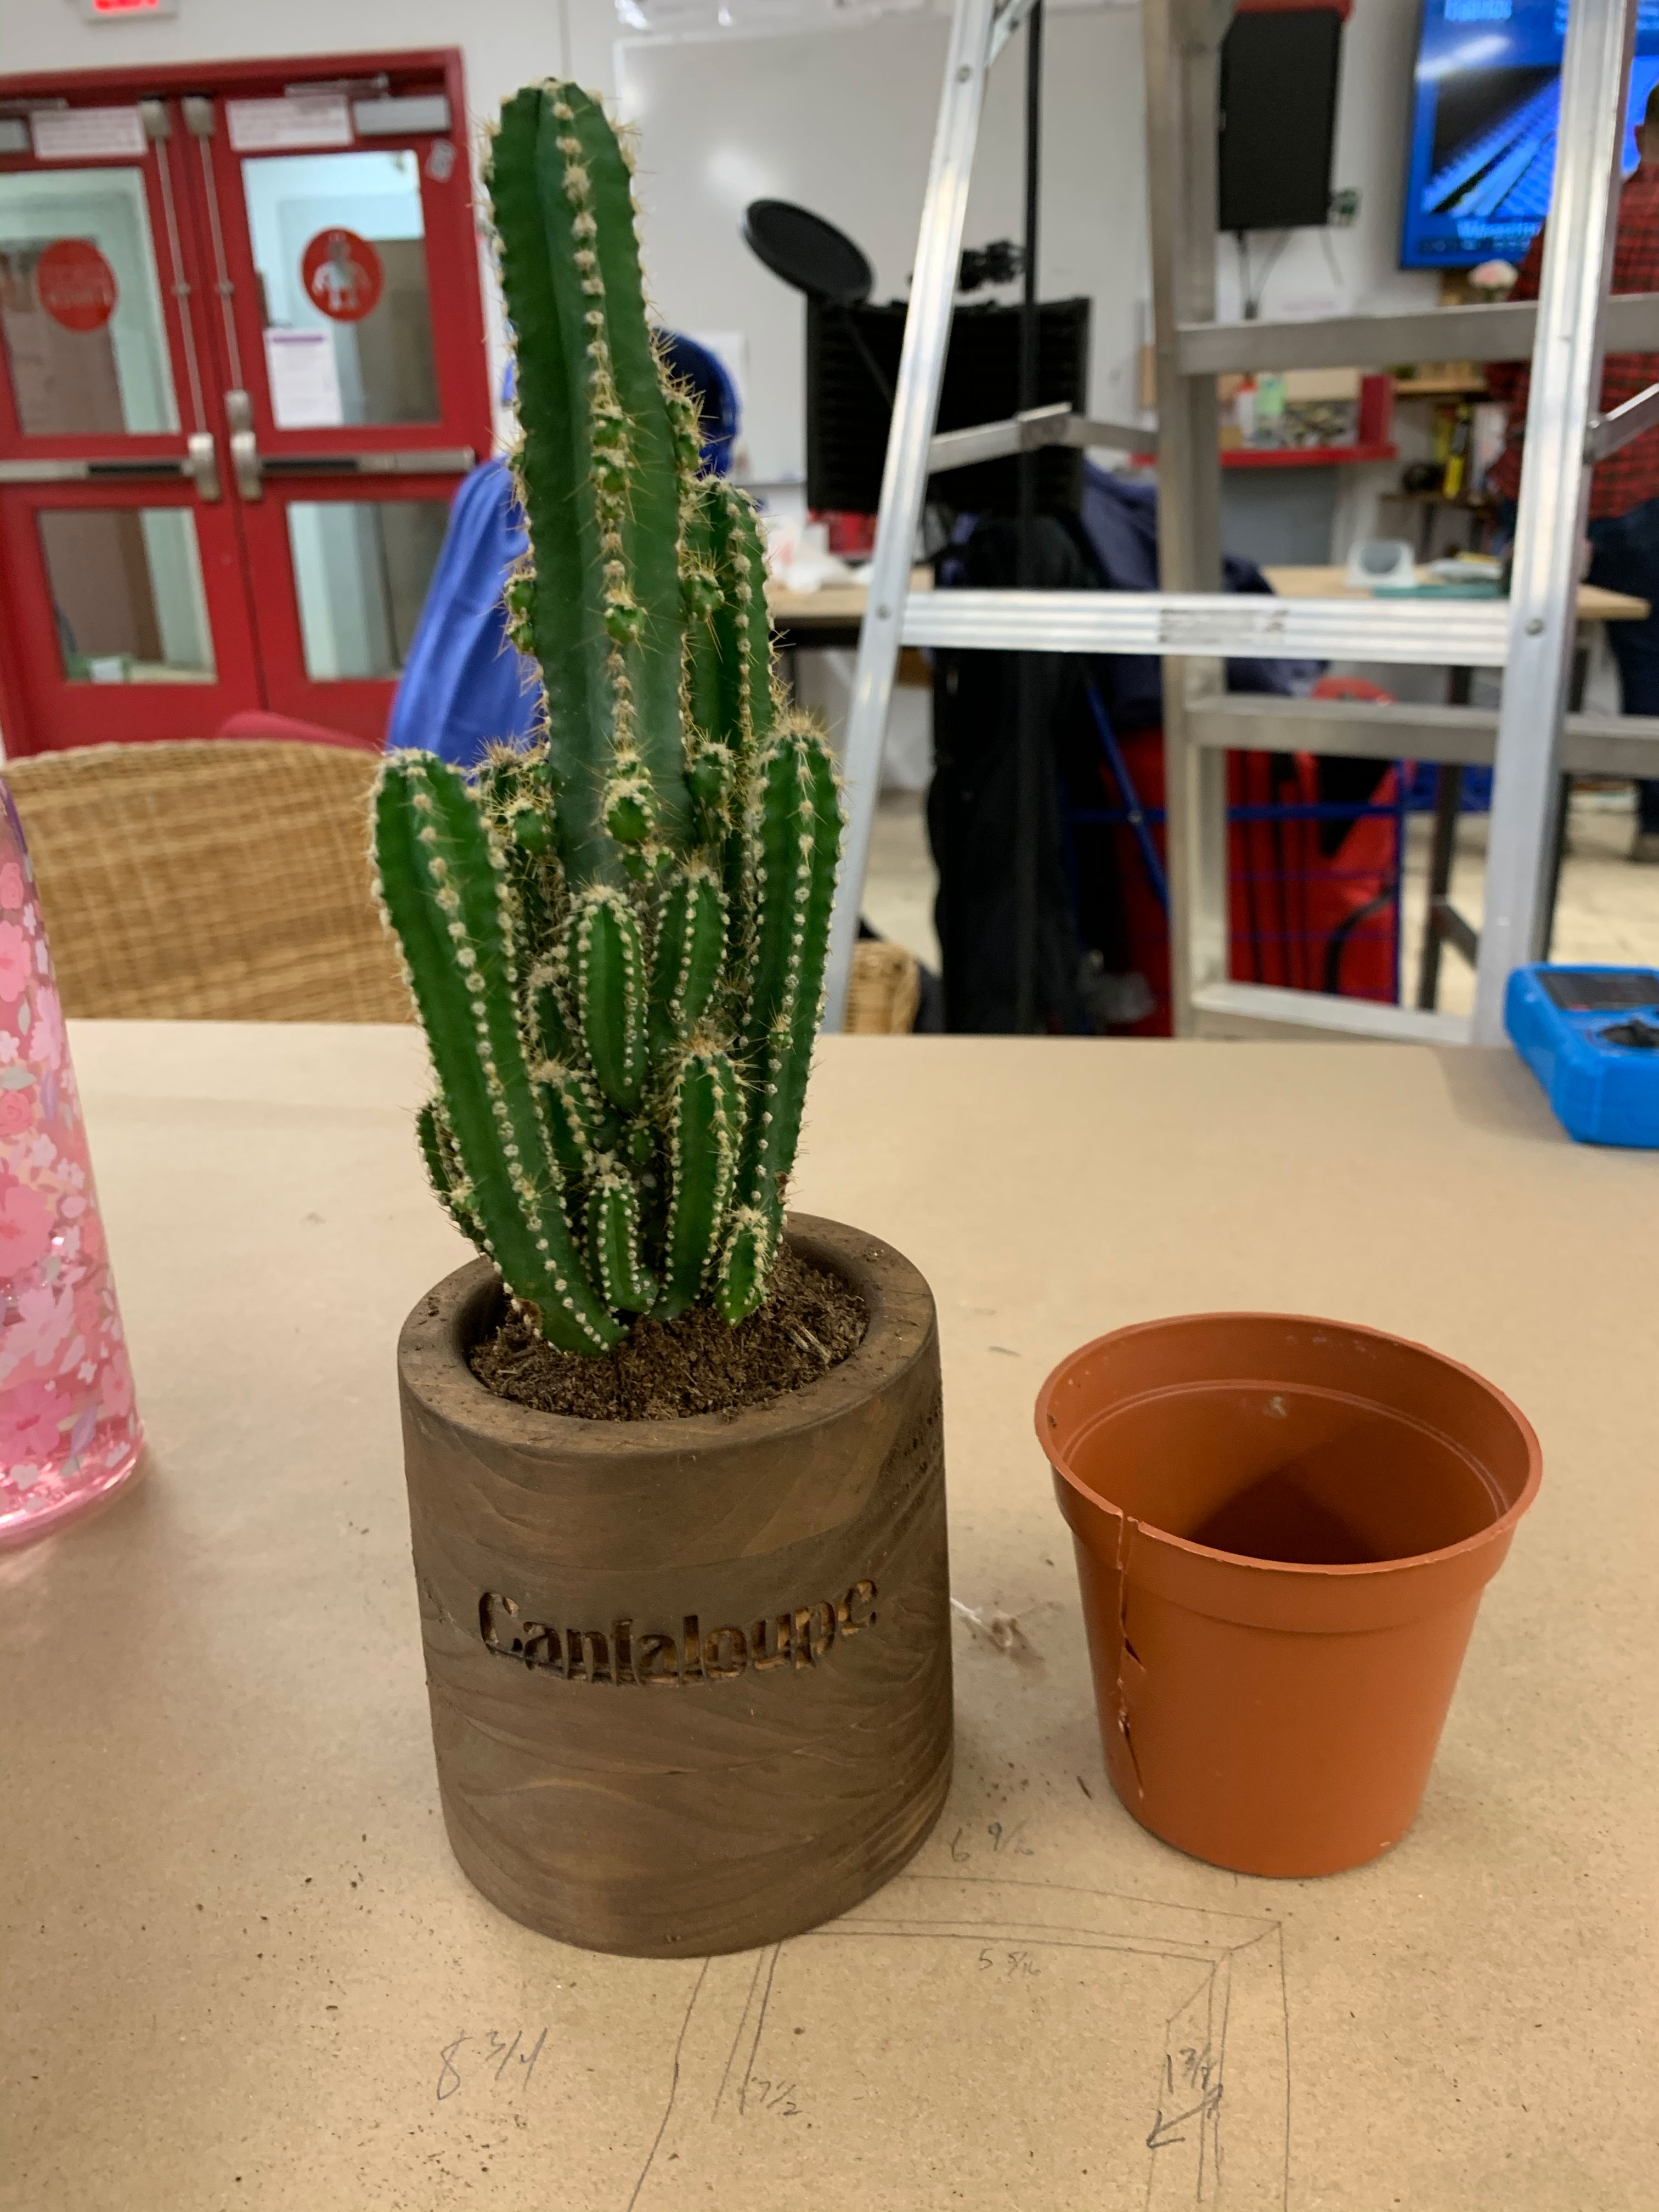
Image: My plant, Cantaloupe in his new home!
![]()
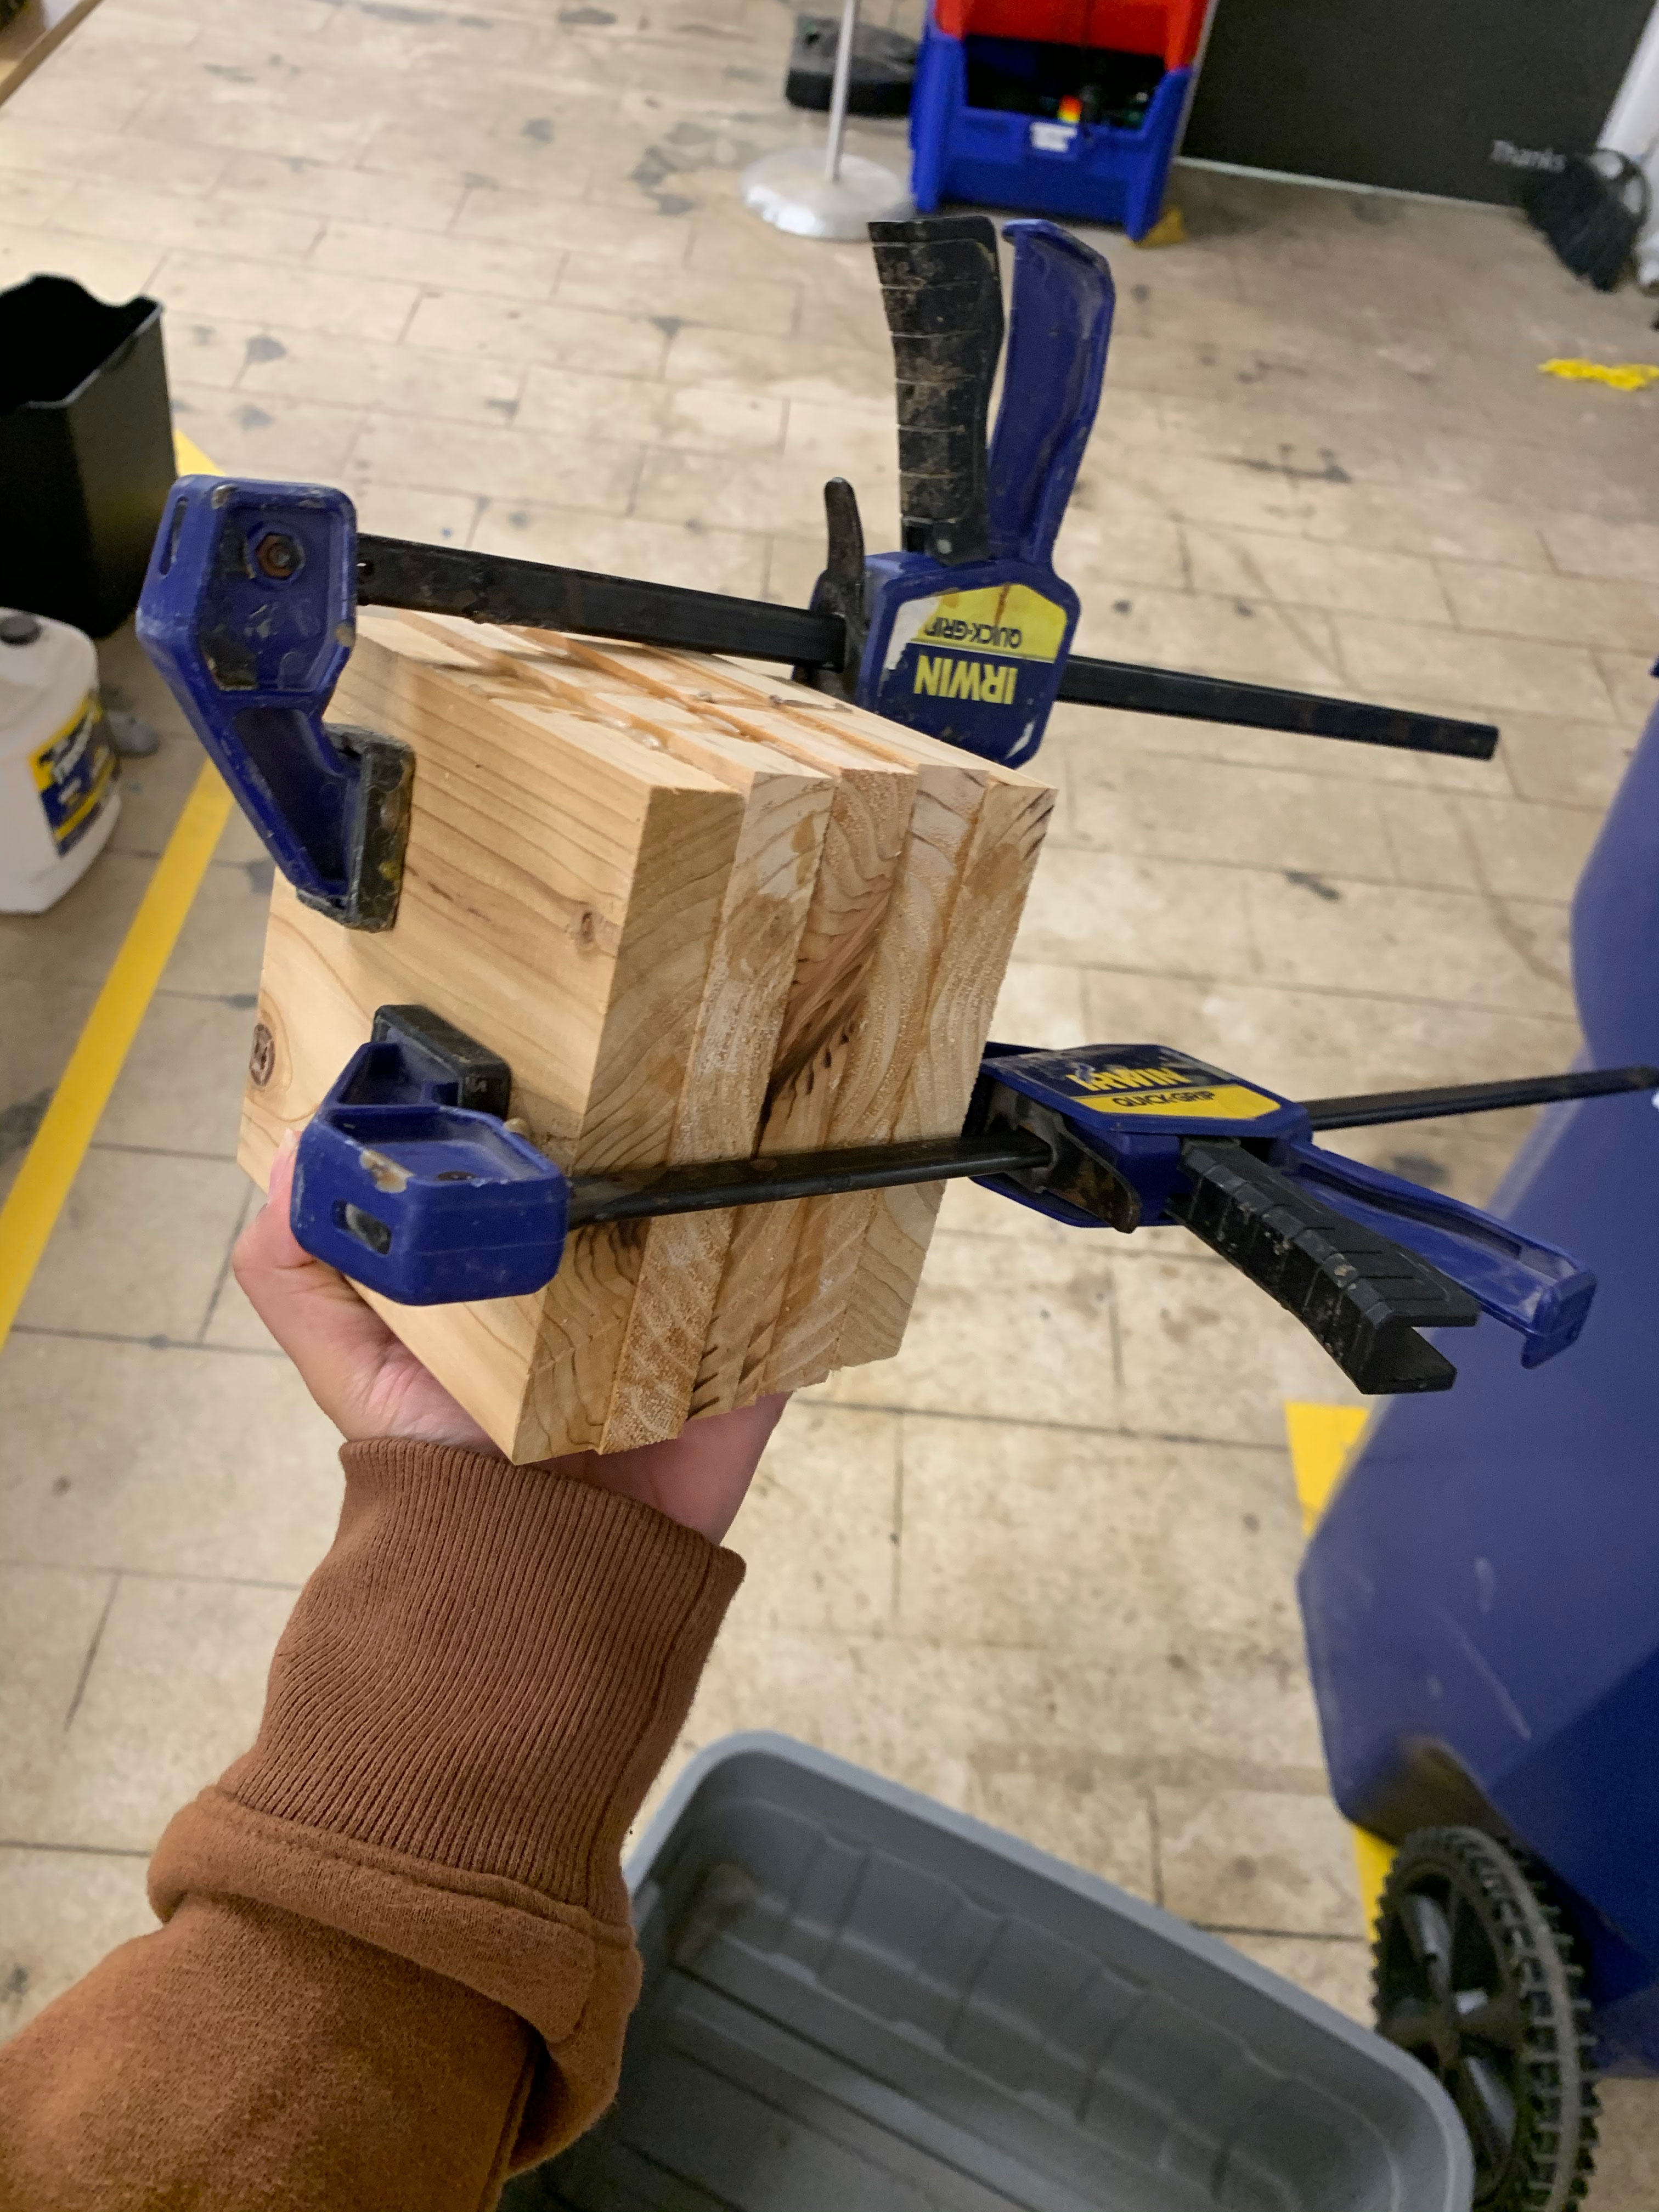
After getting badged on the Lathe at MakeHaven, I cut some leftover pine from a previous project into 5x5” squares and used wood glue to glue them together. Clamps came in handy to make sure they wouldn’t shift.
Later on I used to bandsaw to round off the edges so that it would be easier to carve or “turn” on the Lathe.
Later on I used to bandsaw to round off the edges so that it would be easier to carve or “turn” on the Lathe.
Image: Glued up squares!
![]()
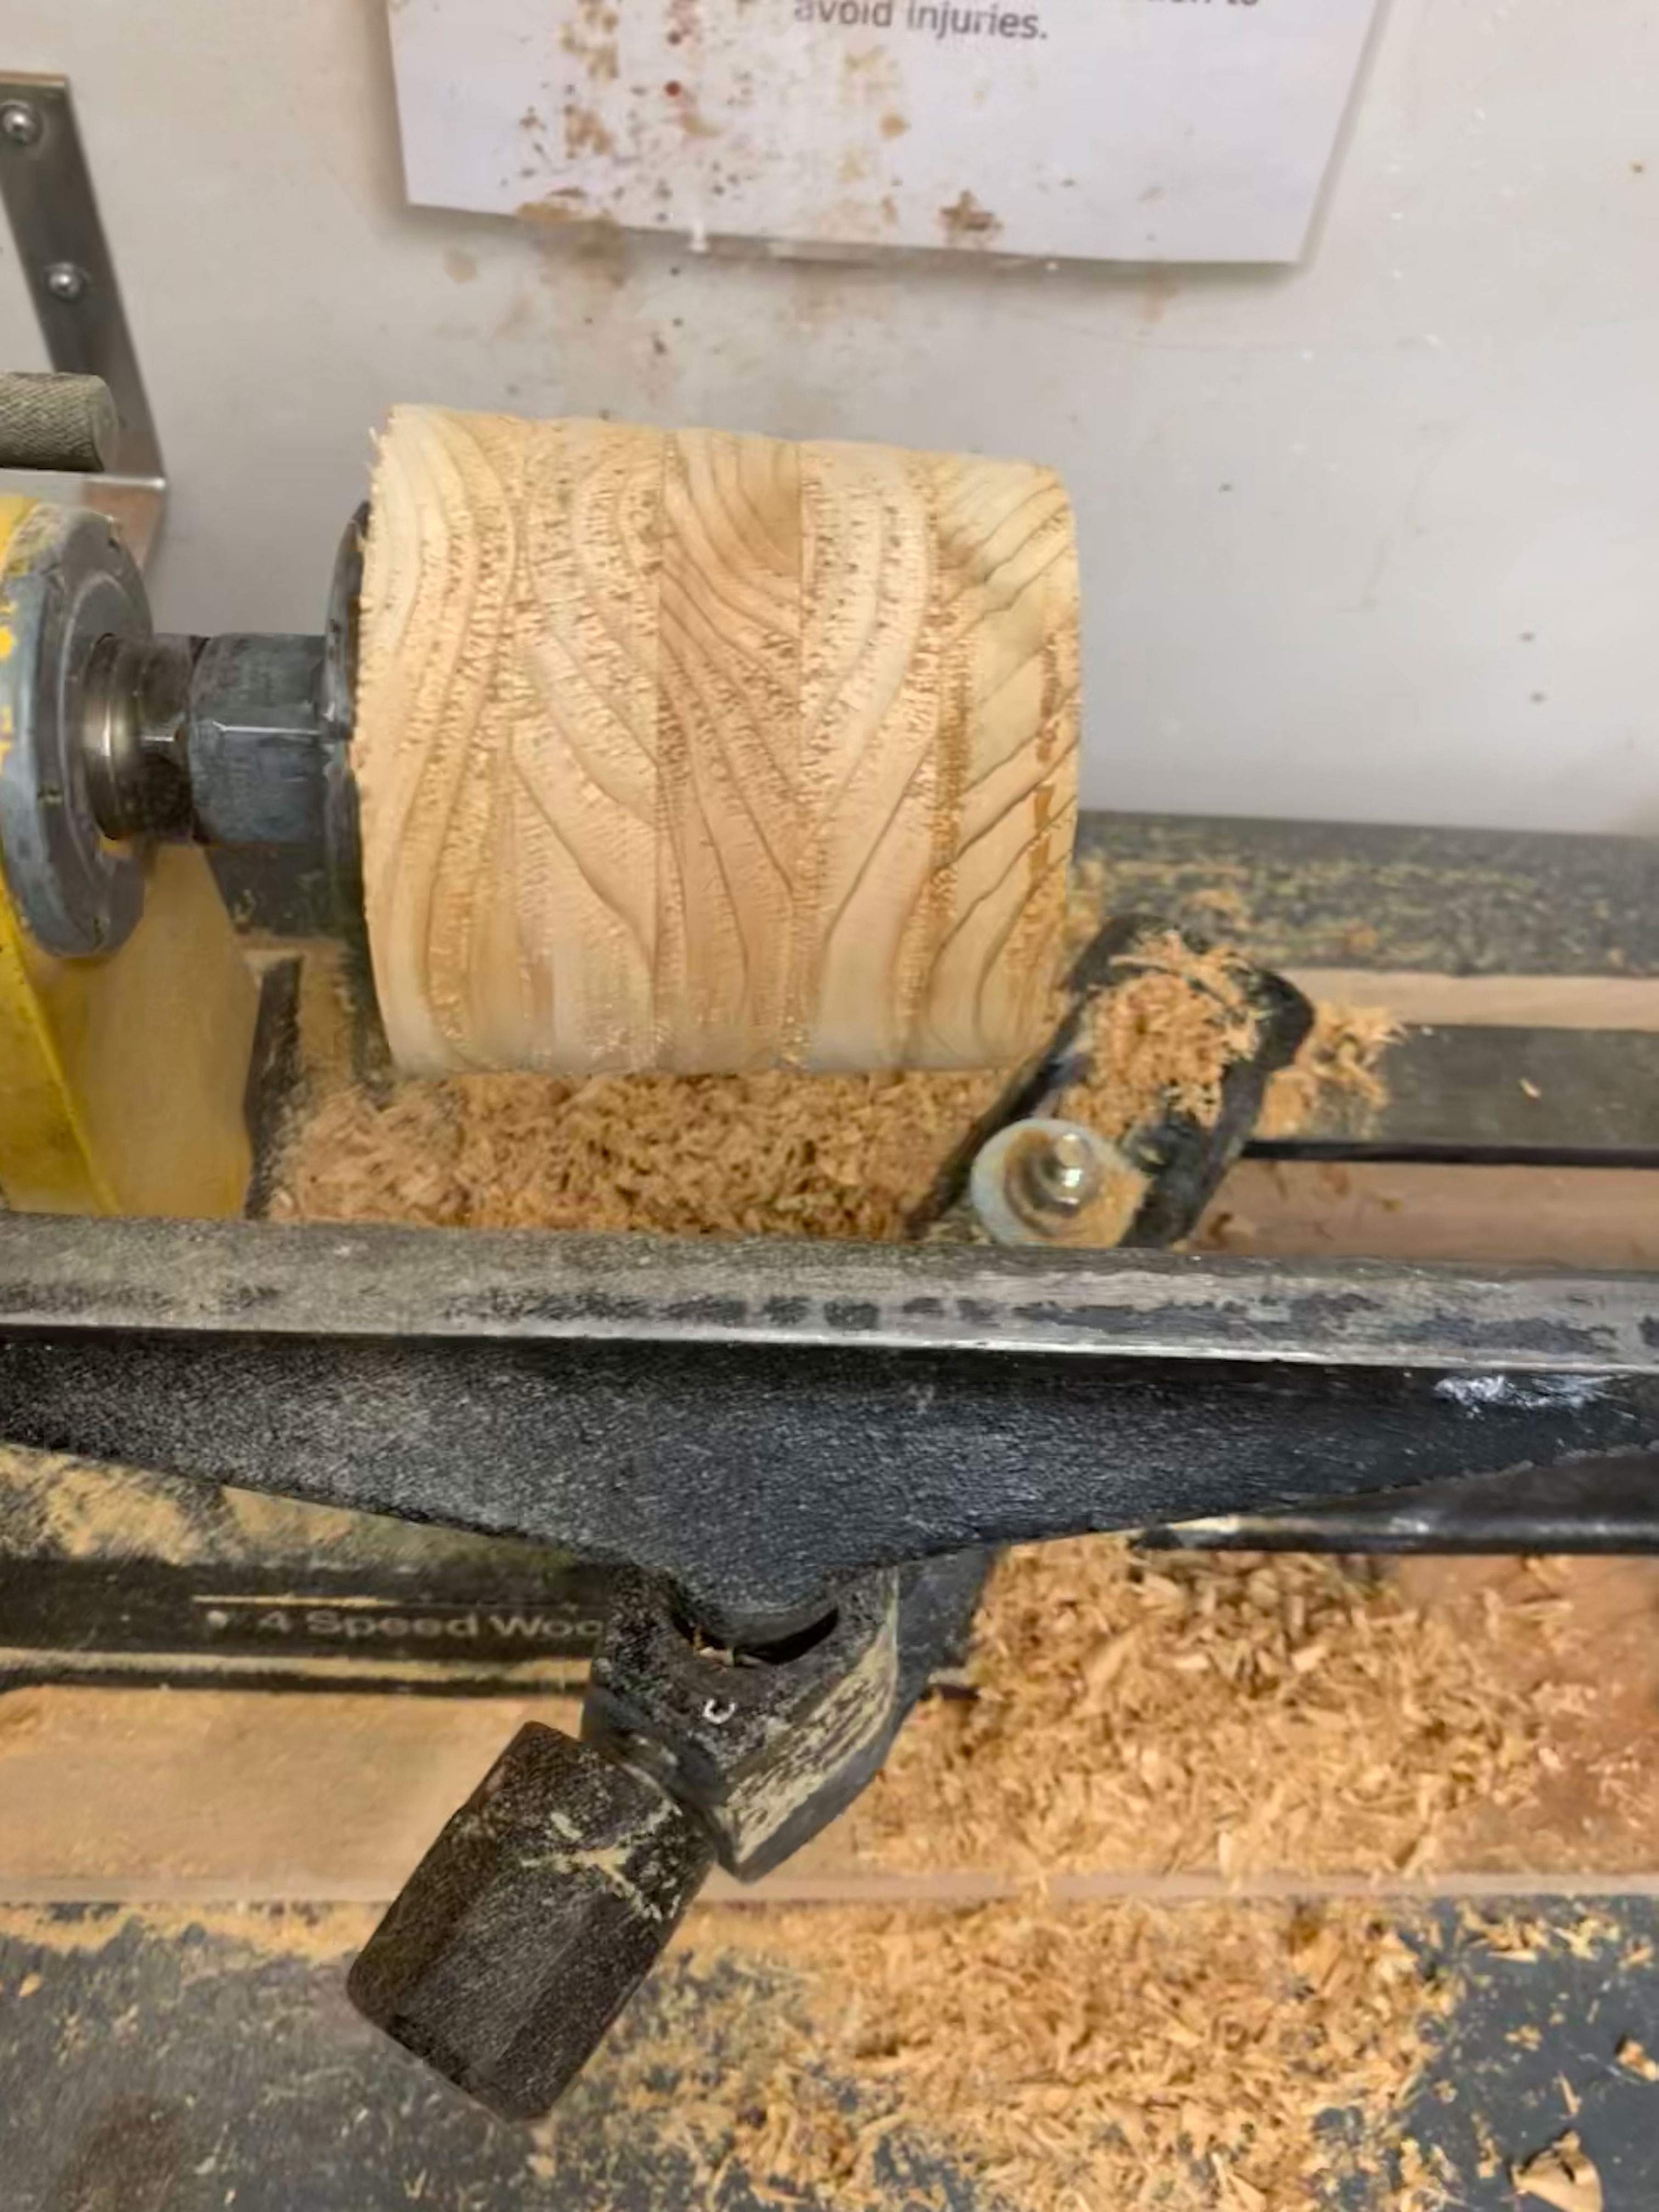
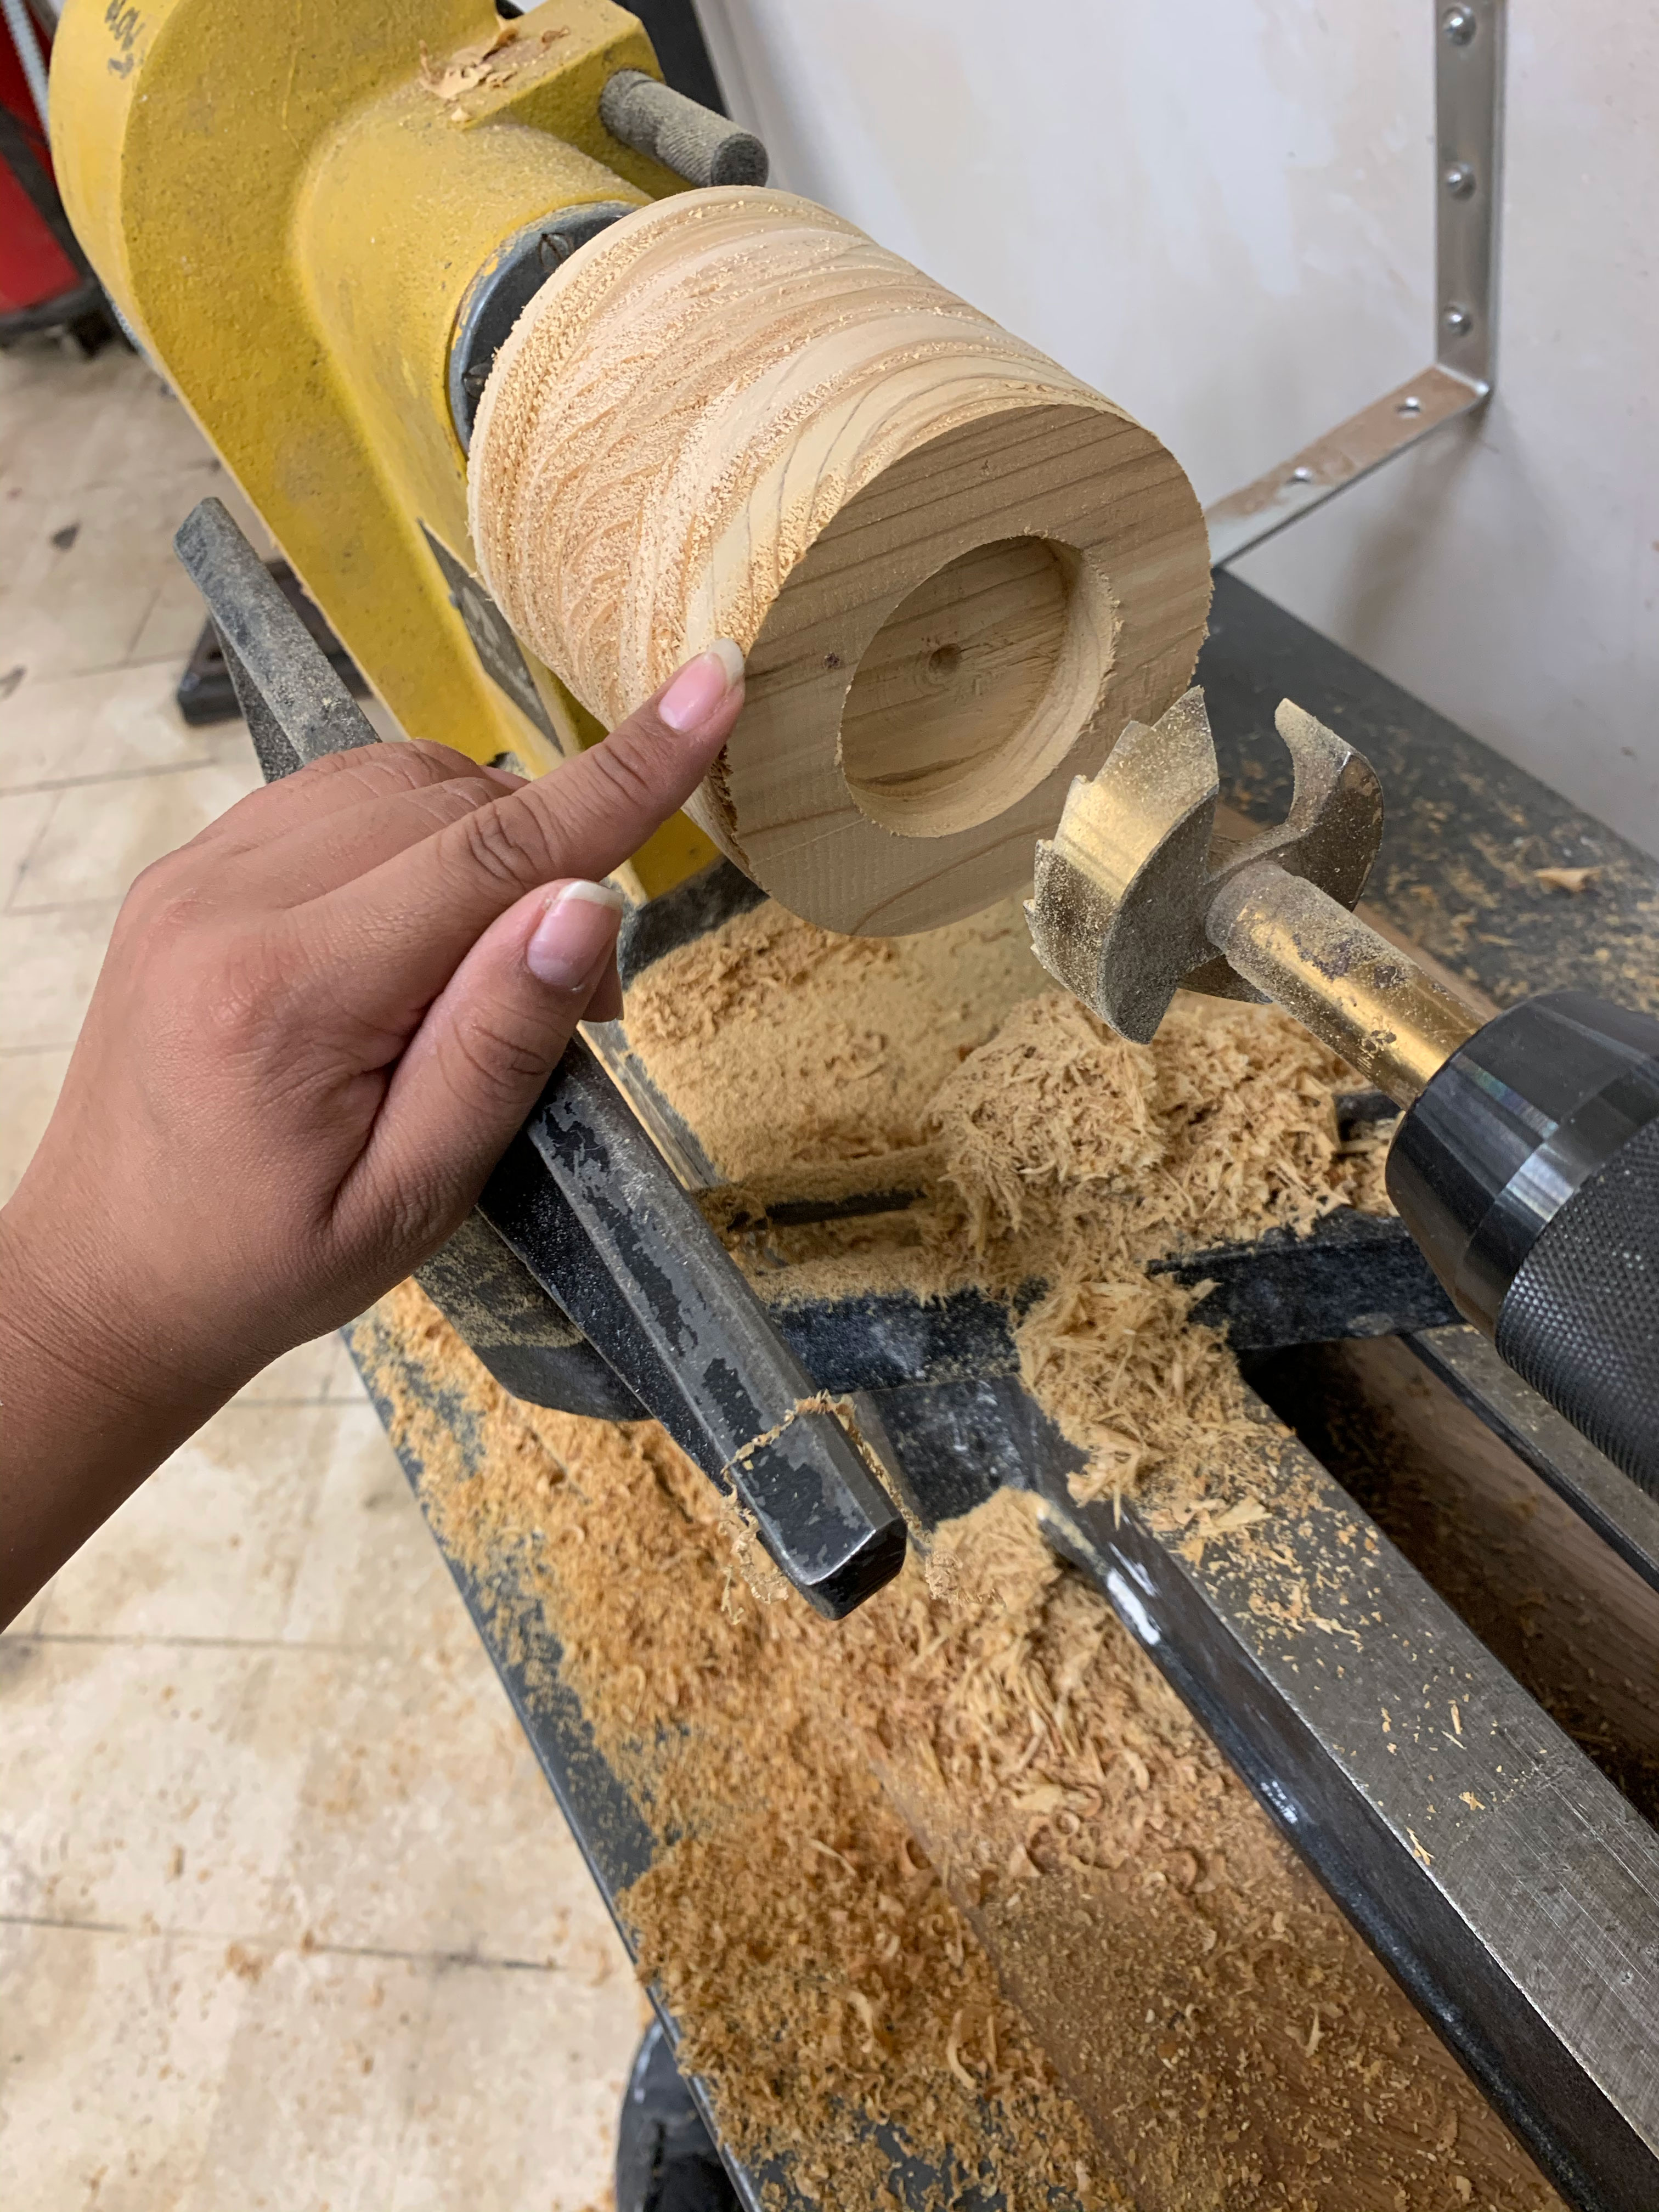
The real fun (and nerves) came in when it was time to finally turn. Using a sharp tool, I held it against my block of wood to essentially round it out. It was really difficult in the beginning because of how bumpy it was, but after a little while, things were looking pretty round
Image: My pot on the Lathe, from a different angle
![]()
Image: My pot on the Lathe, from a different angle

Image: My pot taking shape on the Lathe
![]()
The hardest part of this project was really carving the hole or “inside” of the pot. It feels pretty unnatural to hold the sharp lathe tool against wood that isn’t smooth.
Video: Here’s a video of me turning the inside of the pot!
Video: Here’s a video of me turning the inside of the pot!
Image: My pot on the Lathe, starting to carve the inside!
![]()
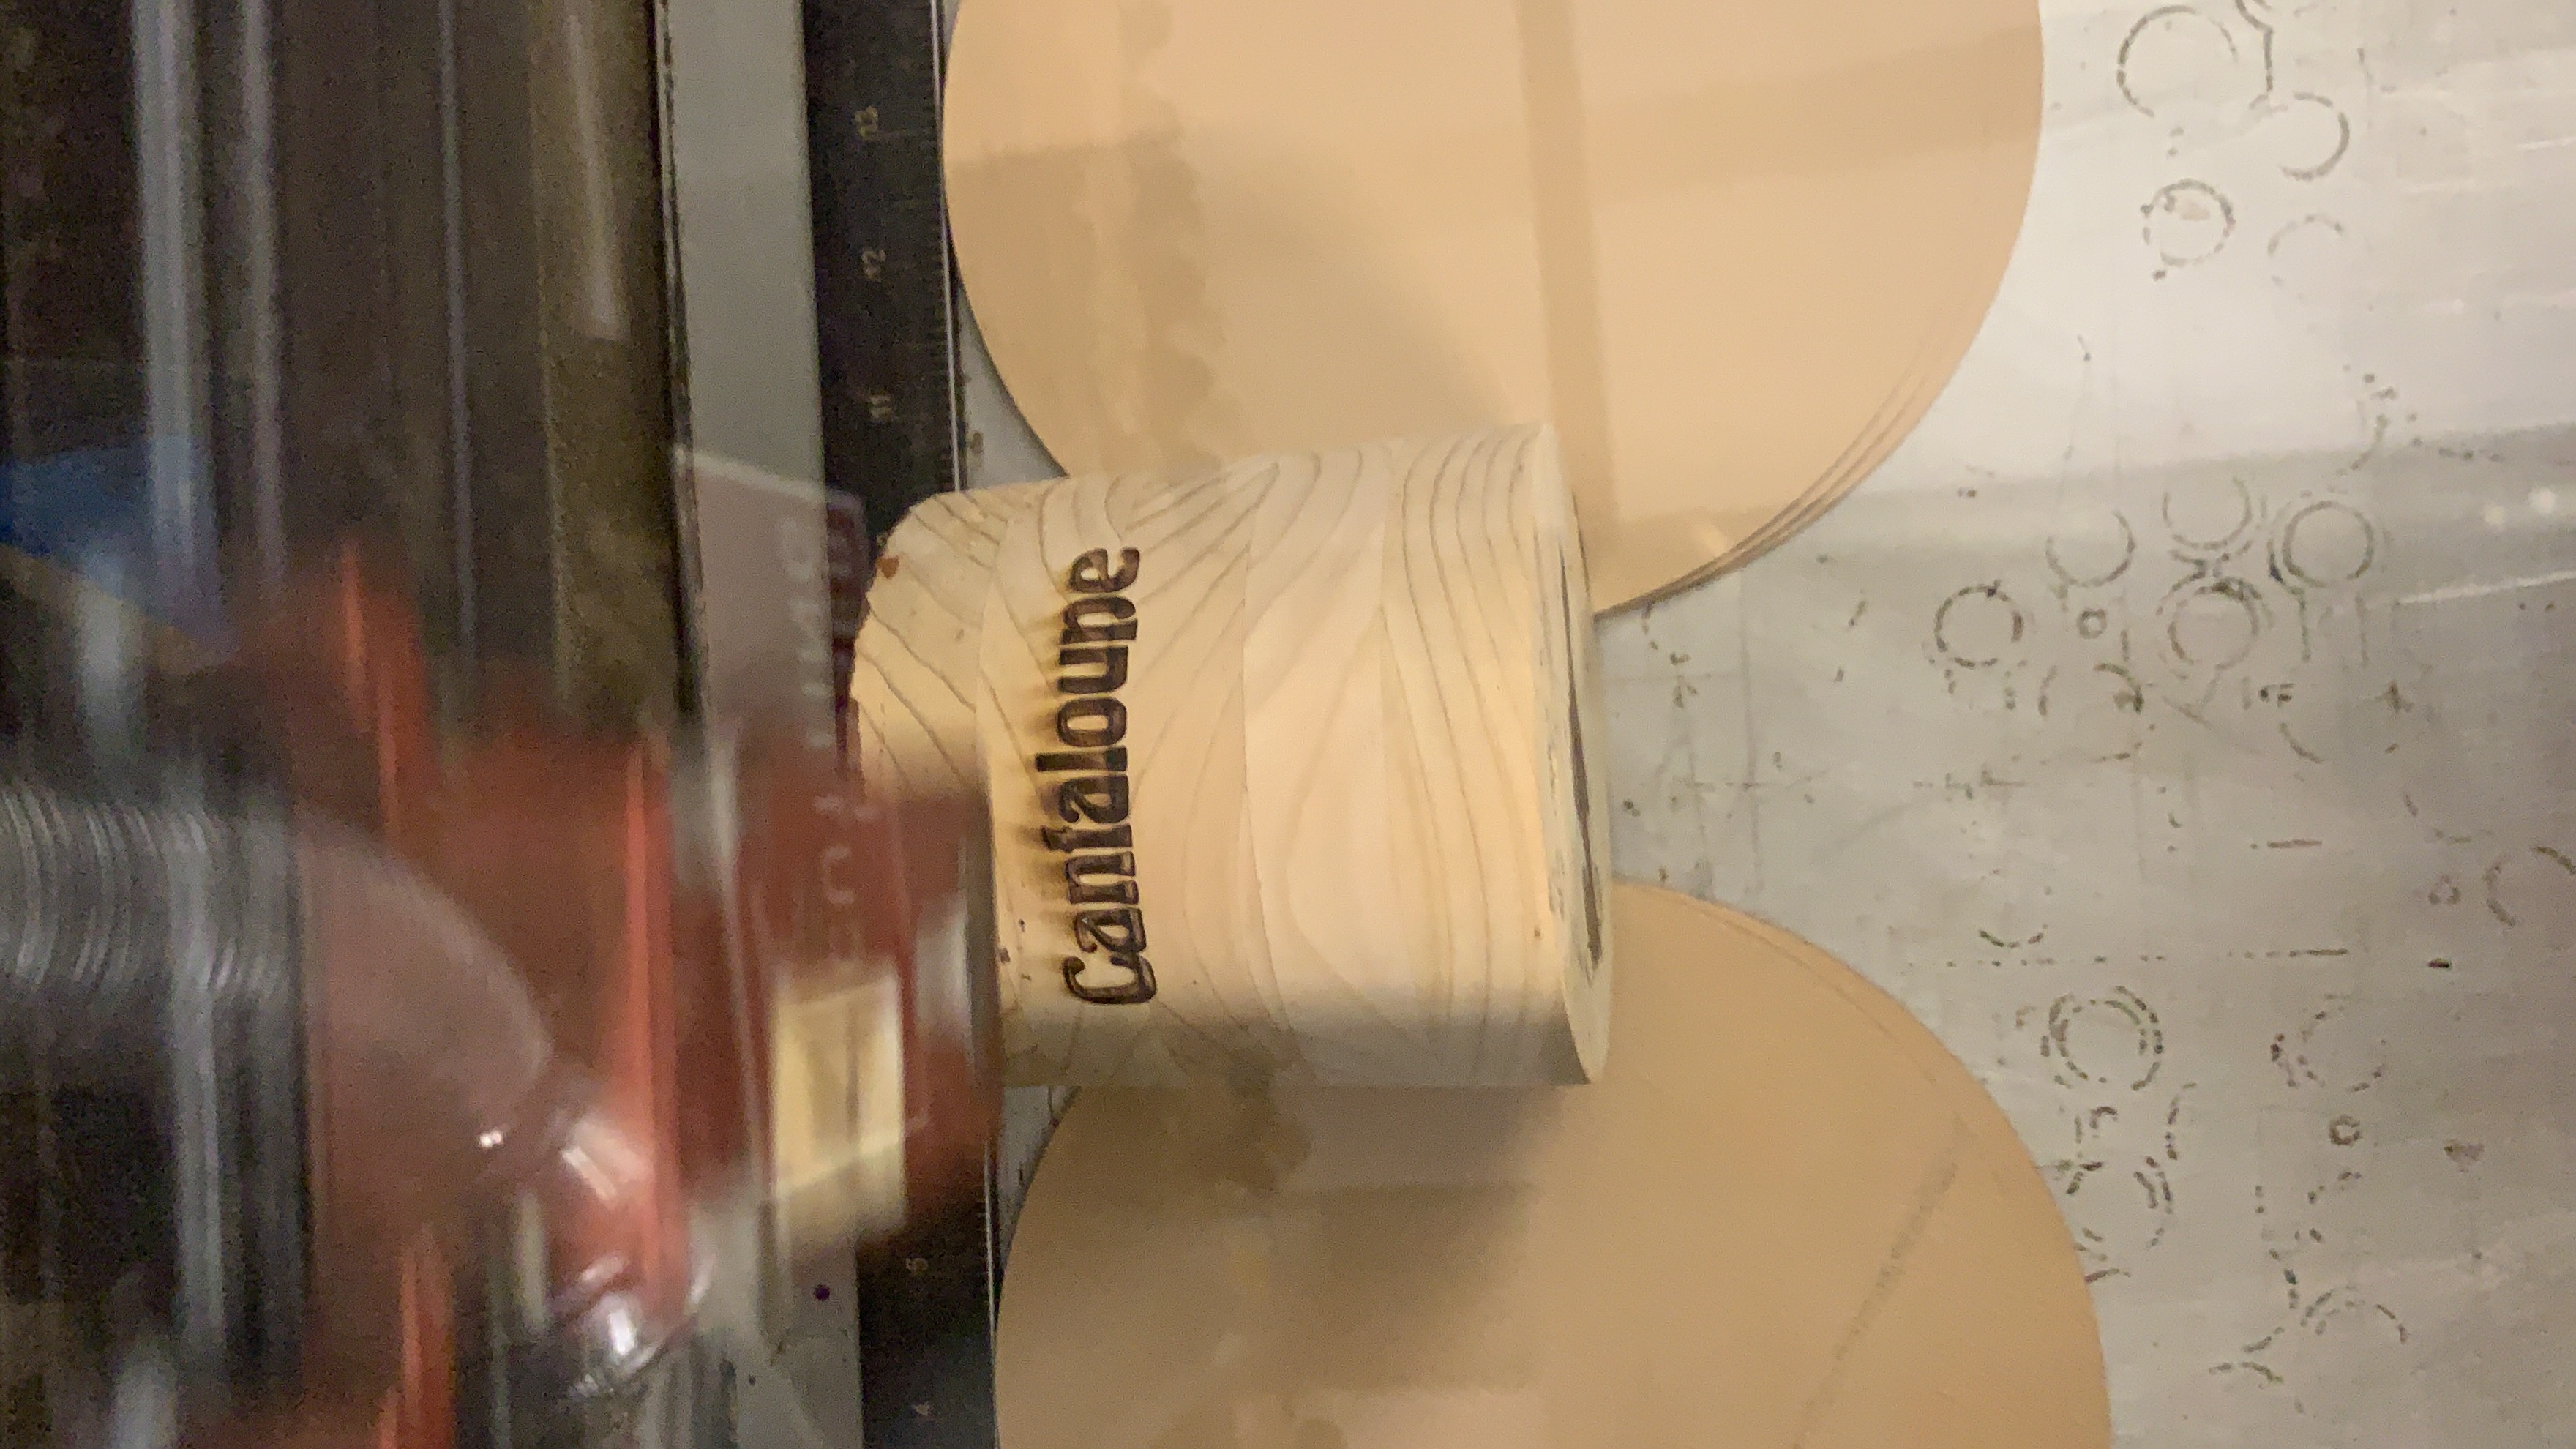
Lastly, before staining this pot with a walnut stain, I decided to laser engrave it with a new name. Thanks to my aunt’s kids, I found the perfect name for my cacti.
Shifting the old dirt away...
![]()
Shifting the old dirt away...
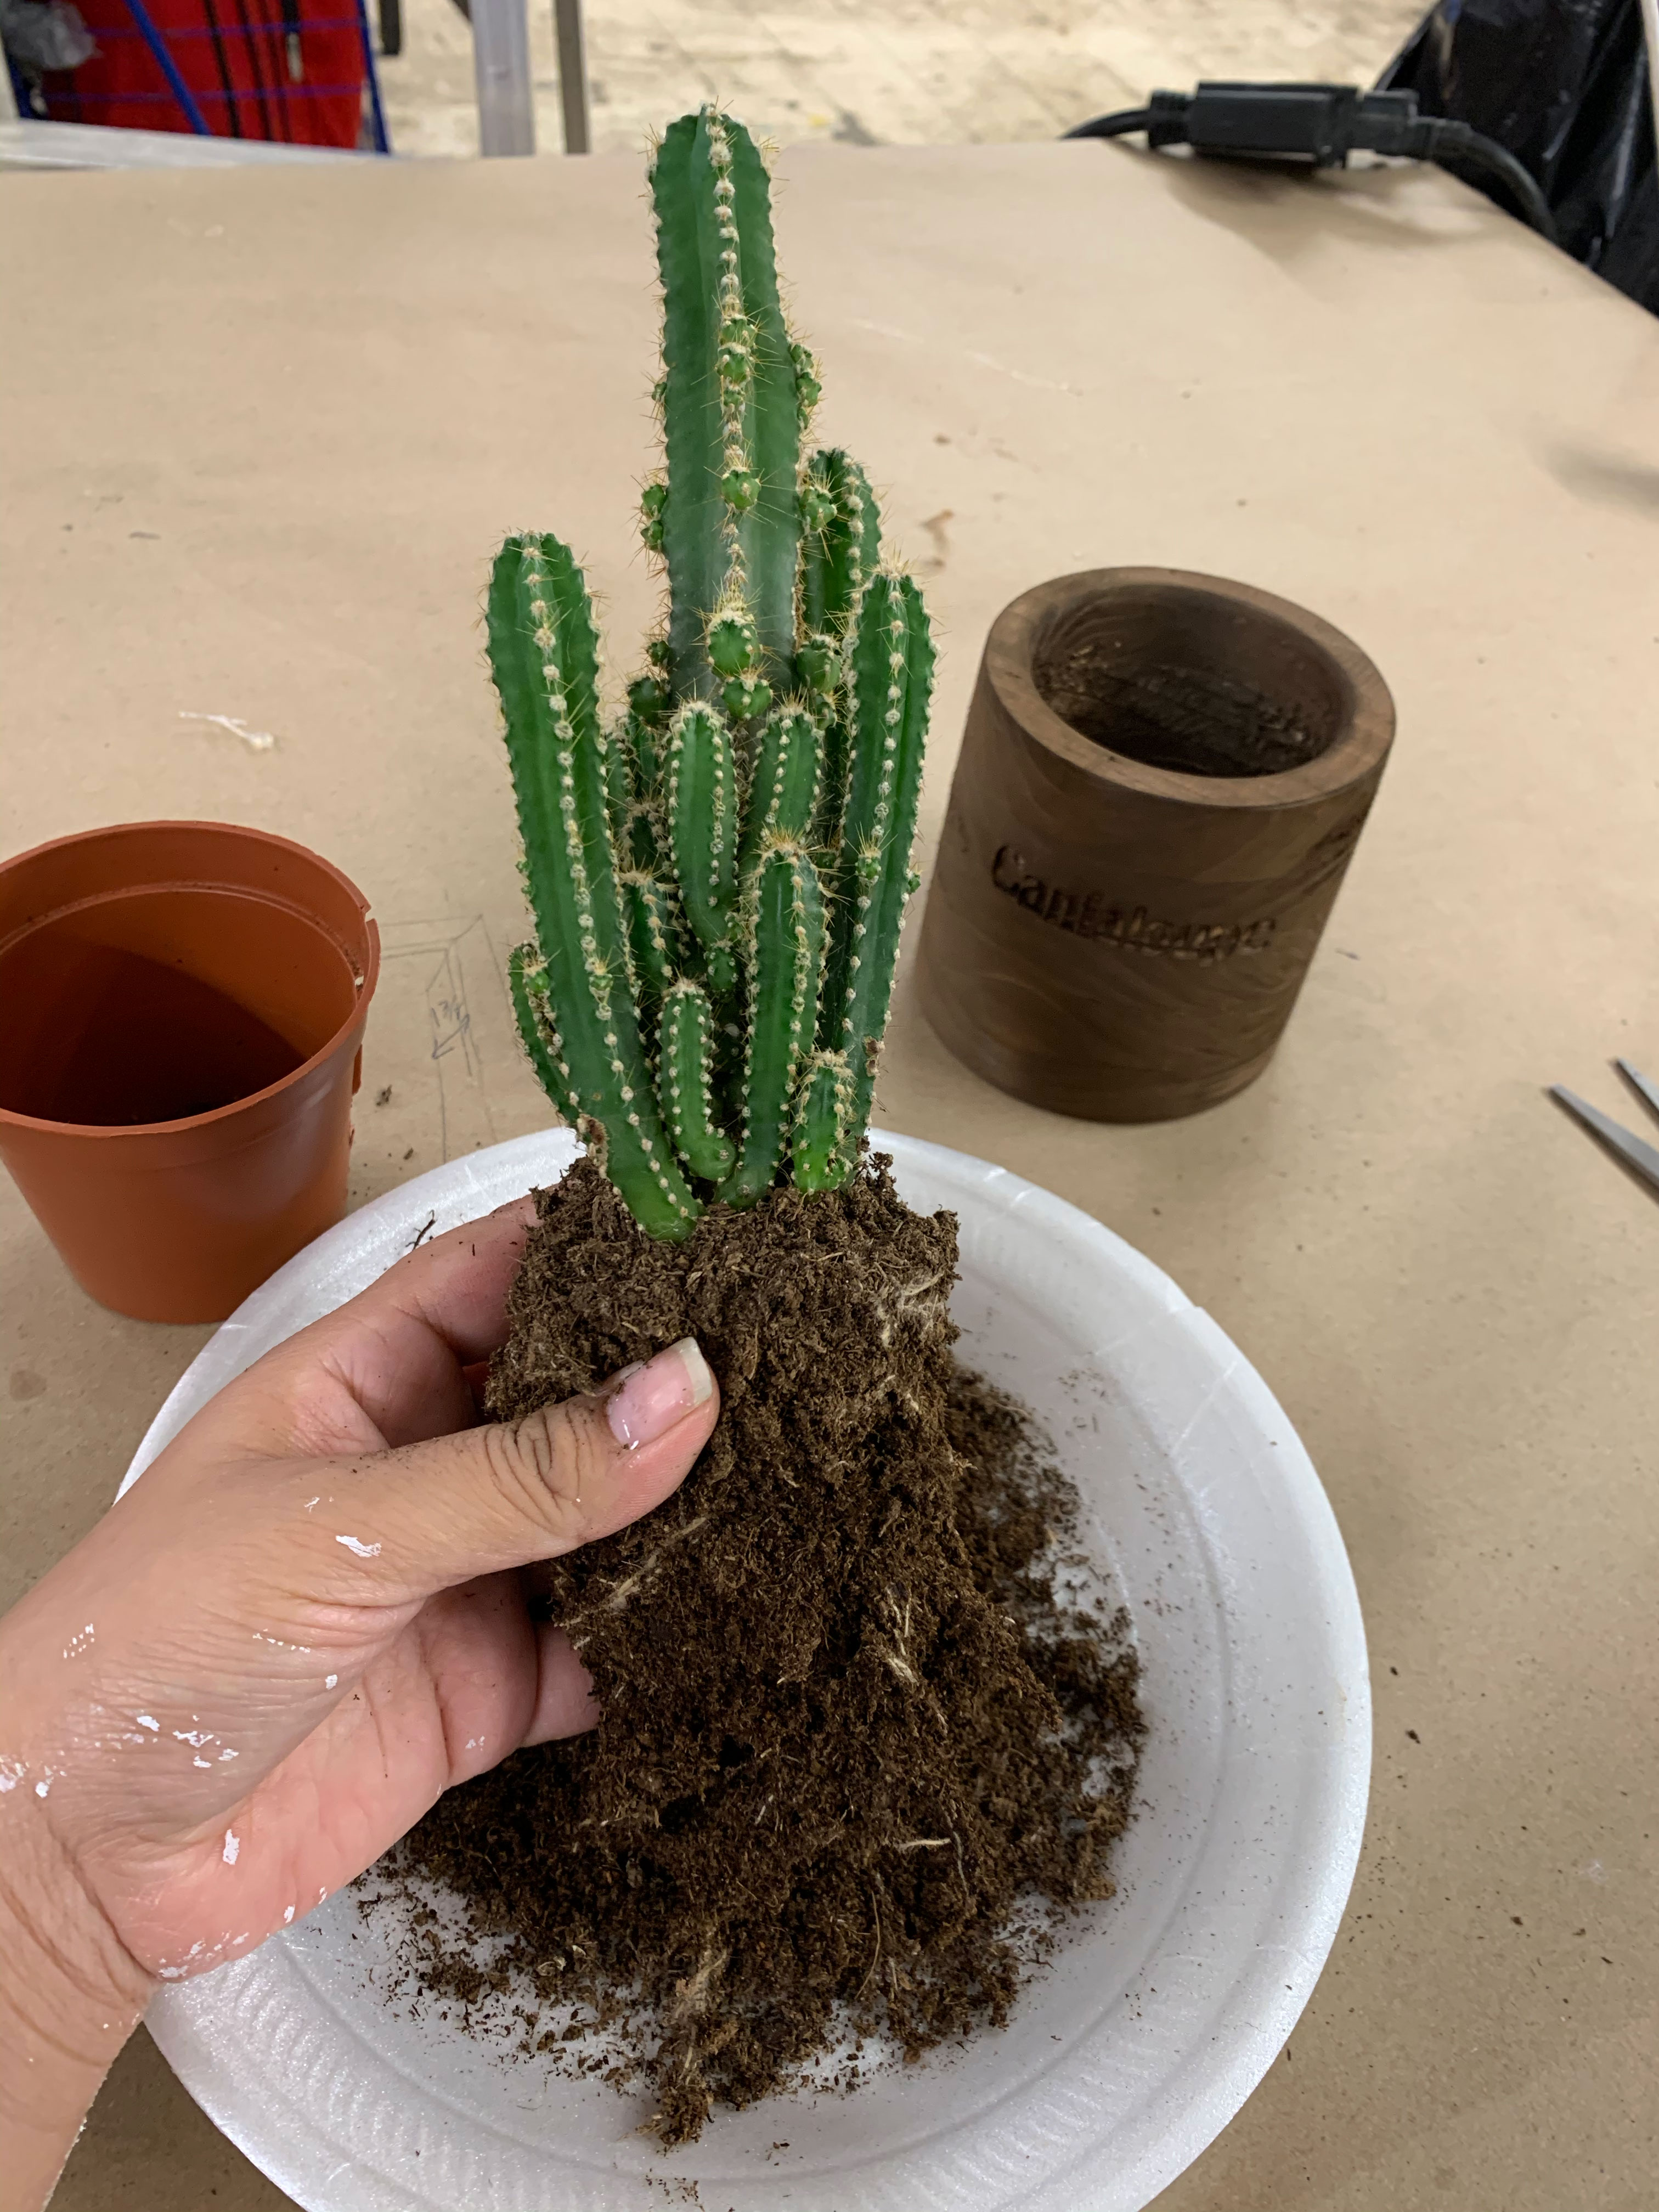
Image: Lasercutting “Cantaloupe” on to my pot.
![]()
This was a nice first project using the Lathe, and I feel ready to try it again with a nicer larger wood!!
Image: New turned pot with old plastic pot
![]()
Unit 1.2
8/2/2020
Assignment:
Develop a Home Page or landing page to be able to record weekly assignments
Develop a Home Page or landing page to be able to record weekly assignments
Starting Off
I started out by thinking if I wanted to integrate my current artist website and add a foundations page, or if I wanted to create a new website purely from scratch. The former sounded less daunting, and with the reccomendation by Corey I decided it would be easier to integrate it with what I have since I don’t have any prior experience using any kind of coding.Image: Experimenting with the website code that Corey gave us
![]()
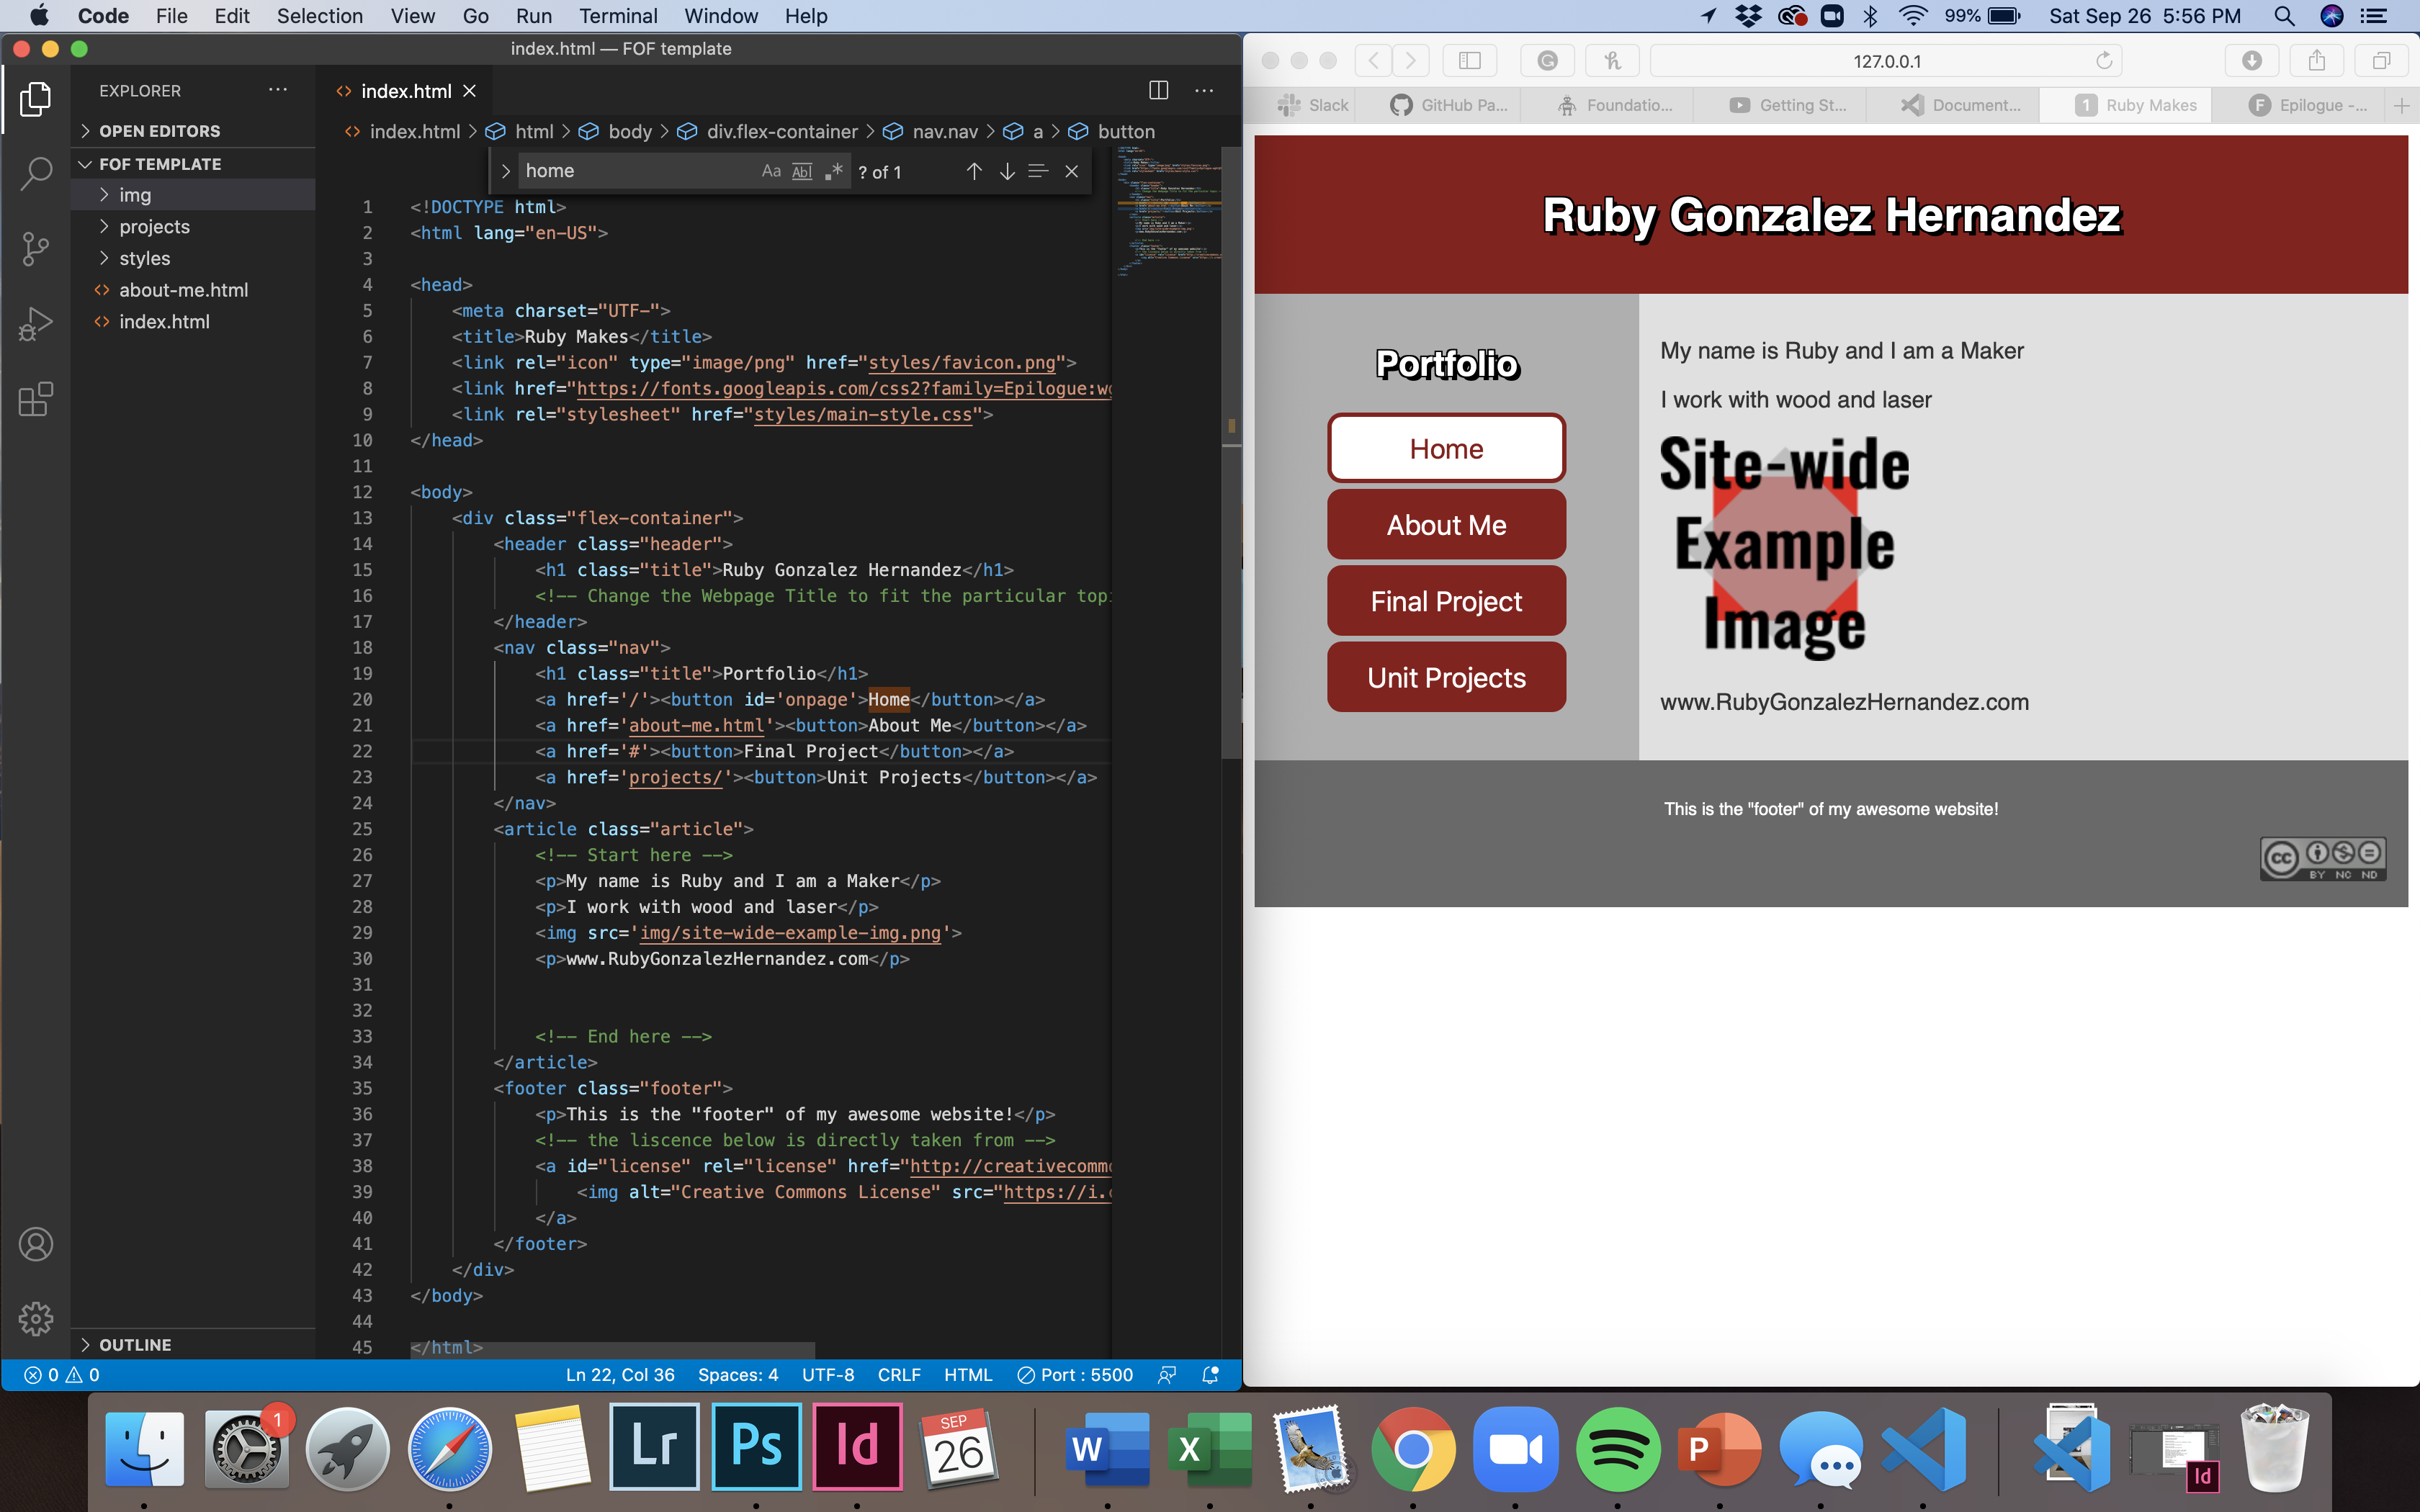
I quickly realized that the platform I use to run my website, CargoCollective, allows you to access and edit your front house (HTML and CSS) code and I began to devlop them and yanked them into Visual Studio Code. It was really confusing at first and I feel like I would have understood more had I just wrote everything myself. Here’s where I understand what Corey meant by writing your own code is easier, because the mistakes are yours vs using a platform like cargo.
It feels (kind of) unbelievable that you can pull files that you created online to your desktop, without downloading them in the traditional sense. What really helped me understand this material is really just writing everything down on paper. I think in future assignments I should share my notes too (see below)
It feels (kind of) unbelievable that you can pull files that you created online to your desktop, without downloading them in the traditional sense. What really helped me understand this material is really just writing everything down on paper. I think in future assignments I should share my notes too (see below)
Image 1: Screenshot of CargoCollective webpage editor, HTML + CSS are accesible.
![]() Image 2: Screenshot of Visual Studio Code open, I have both my HTML + CSS from my webpage open
Image 2: Screenshot of Visual Studio Code open, I have both my HTML + CSS from my webpage open
![]()
 Image 2: Screenshot of Visual Studio Code open, I have both my HTML + CSS from my webpage open
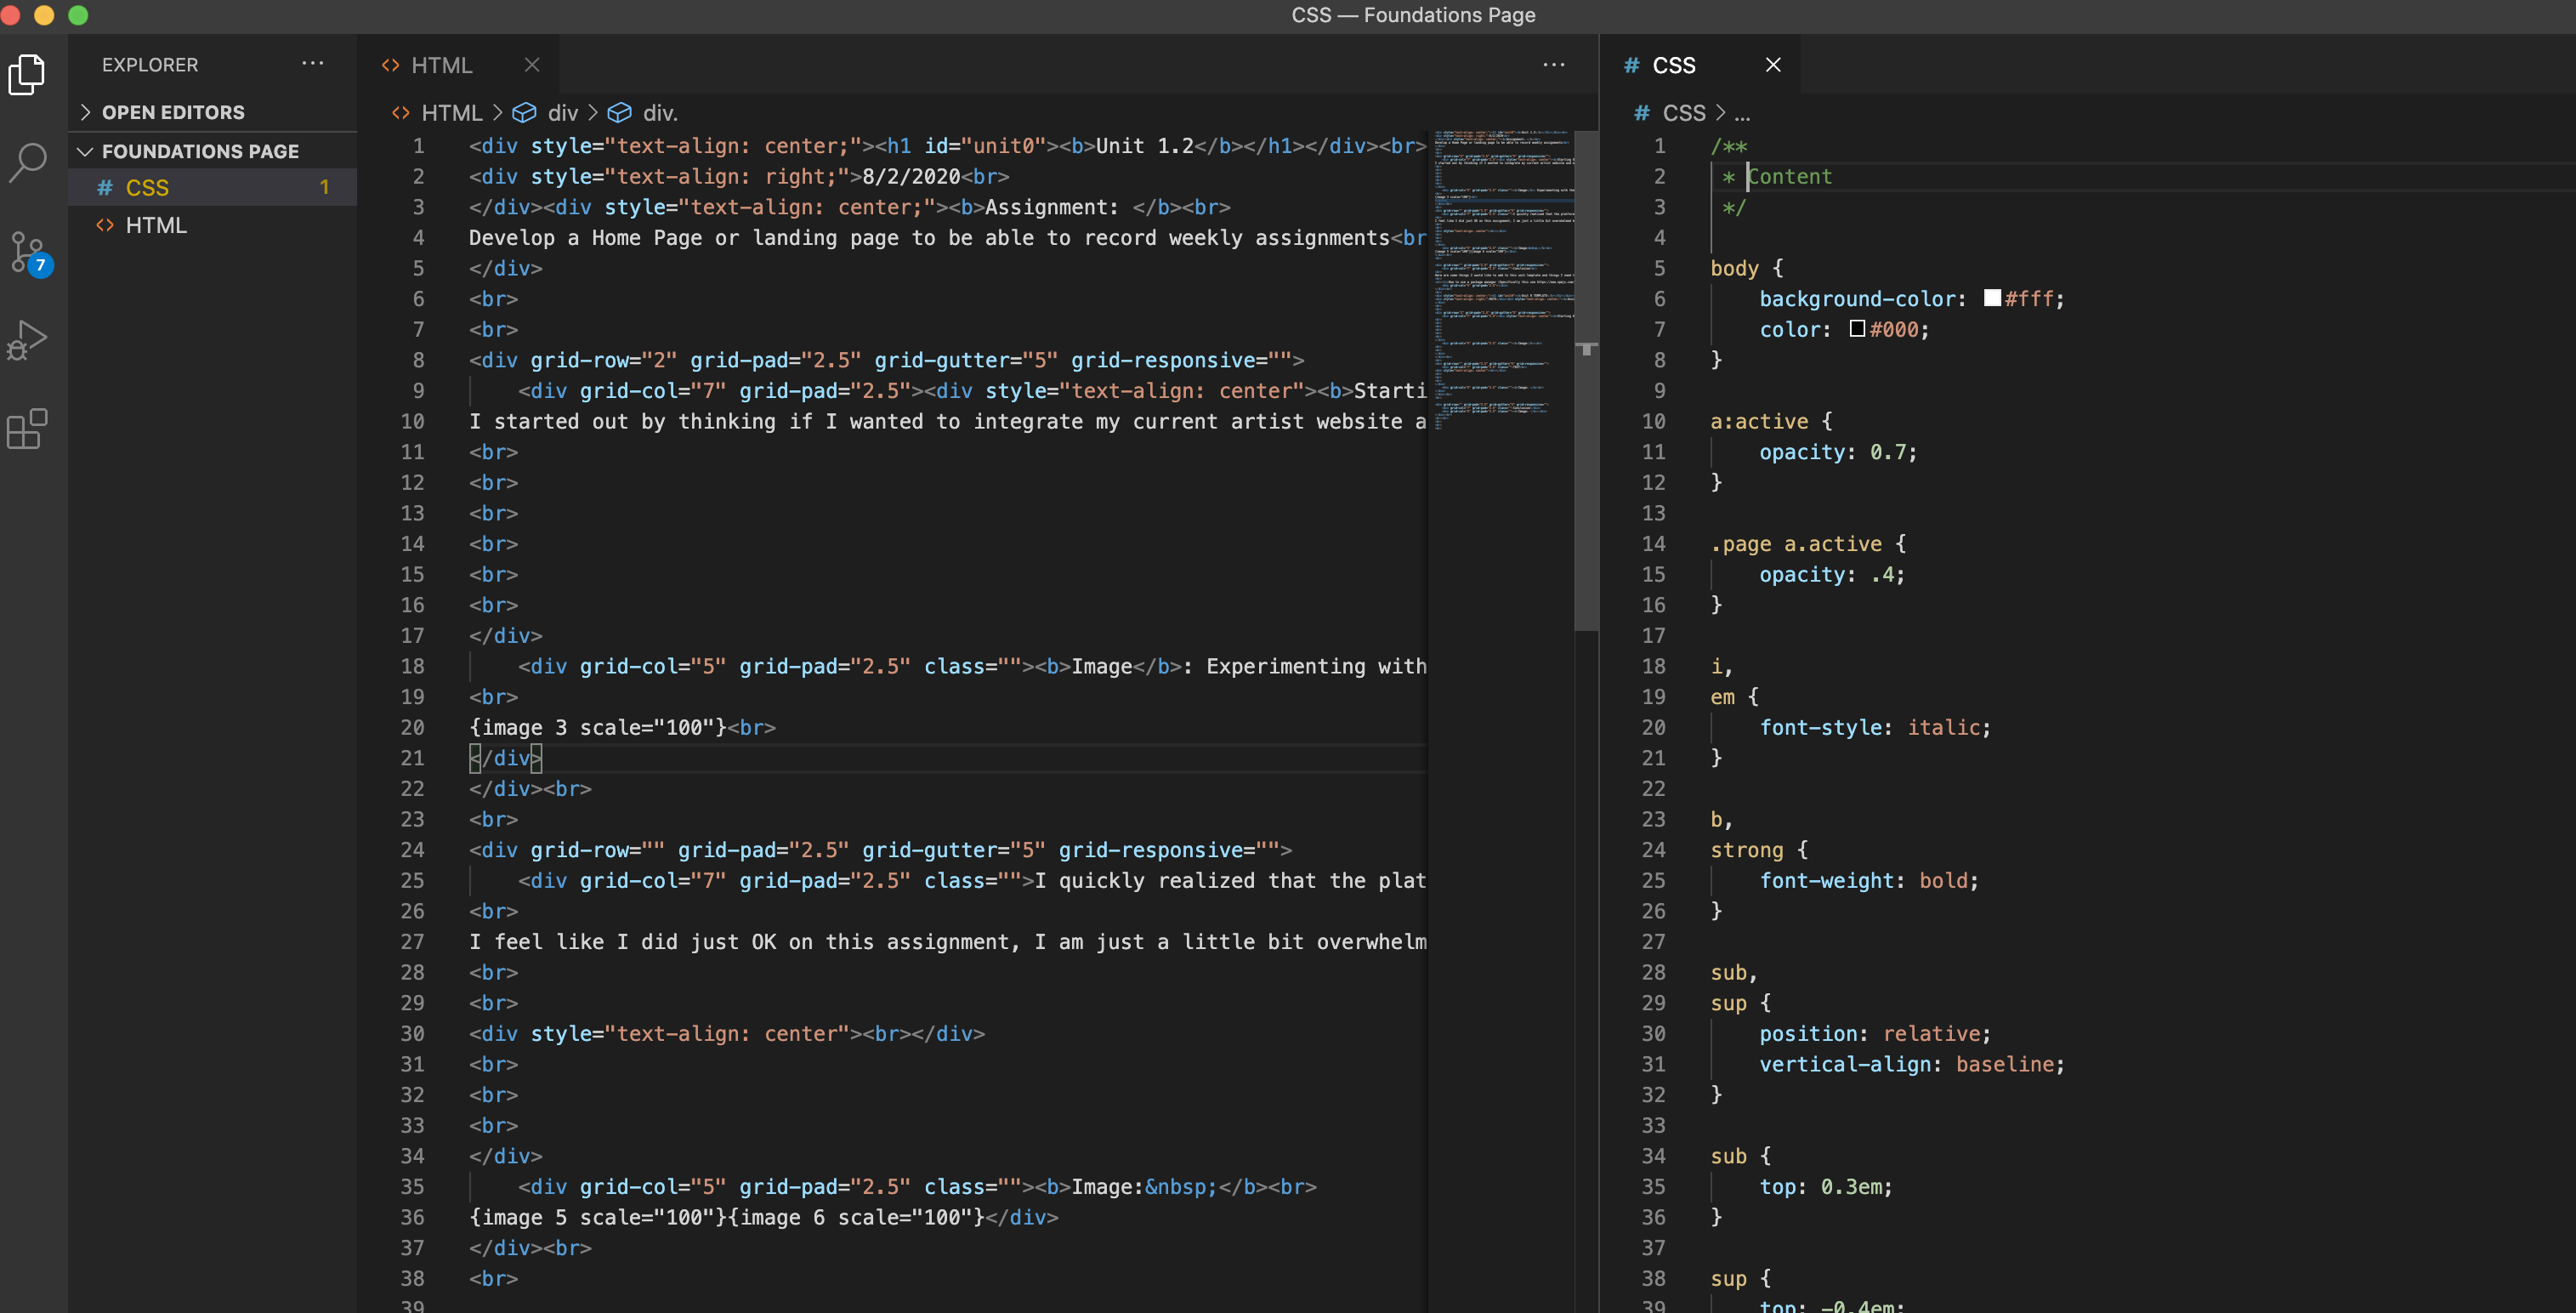
Conclusion
I feel like I did just OK on this assignment, I am just a little bit overwhelmed but I still want to take some time after this assignment to be able to improve this template.
I feel like I have the tools I need to go further.
Here are some things I would like to add to this unit template and things I need to learn
- How to use a package manager (maybe this one: https://www.npmjs.com/package/gallery#data-gallery-src)
- Understand responsive design (ex. on mobile) and how to integrate that without relying on CargoCollective
- Add a drop down menu and have each unit have its own page (instead of jump to page)

Unit 0 TEMPLATE
DATE
Assignment:
Starting Off
TEXTImage:
TEXT
Image:
Conclusion
Image: